

Outdoor adventures are an individual thing, relative to the person. By this I mean that some people’s idea of an outdoor adventure might mean going for an overnighter in their local woods, whereas for other people it could be cross-country skiing through remote terrain for a week, or spending months hiking the Pacific Crest Trail, for example.
No matter what your idea of a wilderness experience is, it is likely that you will prepare for it. Be that by packing a bag, buying food and supplies, studying a map, learning about the environment you are visiting and making travel arrangement of how to get there.
If you are to go to these lengths to prepare your equipment and mind for such a trip, why would you not put in the effort to get your body ready for such a trip?
Some outdoor activities can be physically and mentally tough. They can involve hard repetitive tasks such as walking, hiking, sawing, axing, carrying wood, canoeing, snow shoeing, climbing and skiing but to name a few. All these activities require a basic level of fitness in order to achieve them.
If you are planning on taking a wilderness journey you should want to prepare the best you can to mitigate risk. A big risk you might face is getting injured; the fitter, stronger and more flexible you are the less likely you are to get injured.
In this article, and the next two to follow, I will outline clear guidelines on how to get and stay fit for the outdoors starting with the very basics.
WARNING: all activities suggested in this article are to be undertaken at your own risk. This article is intended to provide guidance and inspiration on how to improve your fitness. If you have any concerns about your ability to safely carry out these activities without injury or endangering your life please seek professional medical advice and the guidance of a qualified fitness instructor to oversee each training session you undertake.
The goal of this article is to assist you in forming and keeping a solid cardiovascular endurance training routine, as well as a resistance training routine and a stretching routine. These three types of body movements are the key to staying fit, strong and injury free on your outdoor adventures.
Also, you do not need a gym membership or any specialist kit to do this training plan, just some outdoor or gym clothes, a pair of trainers or boots, and a backpack are all you need. These are items most people have or can borrow. An optional extra is a fitness watch (see below).
Cardiovascular Endurance
Walking
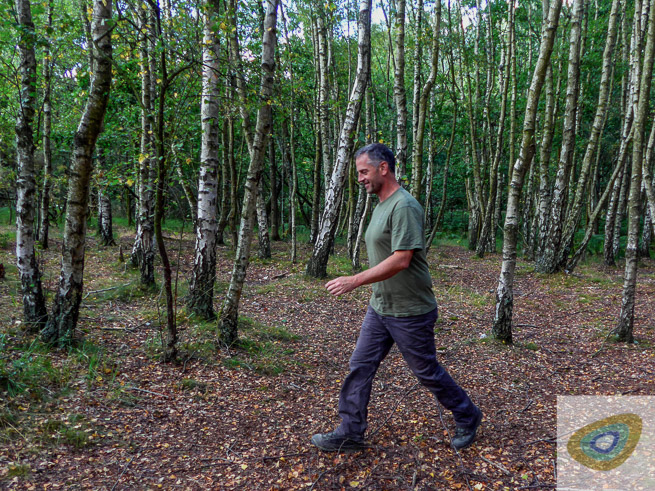
The first step is to up your step count, within your own framework of what you think a brisk walk is, go for one. It doesn’t matter if this is around the block or if it is up a mountain and back, you do what you think will get you breathing slightly harder.
The “brisk” in a brisk walk is personal to you. Start with one brisk walk a day and build up. Find a way to build this into your day. Perhaps there is a journey that you might normally take in a car or on public transport that you could instead walk to your destination.
A base-line guide for this can be achieved using the step counter on a smart phone app, a Fitbit or a GPS watch. Find out what your average step count is and work on a way of increasing it day by day. Say it is normally 5000 steps a day, work towards upping this by 5%-10% each day.

Start on Monday with your starting goal of steps, whatever that many be for you personally, and increase it by between 5%-10% each day of the week. Try to fit in one rest day toward the end of the week. Ideally that rest day would be on the Saturday with a big day that really stretches you on the Sunday. The Sunday walk is designed to push you out of your comfort zone. You have trained throughout the week for this walk and had one day of rest before. Now is the time to go for it and see the benefits of your hard work.
At the beginning of each walk start slowly, donít just charge off, give your body time to warm up and limber up. Don’t stretch before hand, but do try to activate and mobilise your joints. Try to being lifting your knees a little higher at the end of each step for a short distance, then flicking your feet higher behind you at the beginning of each step for a short distance. After this try side stepping for a short distance, then have a go at walking backwards for a little. If you are feeling comfortable with all these movements have a go at turning all the way around while walk.
These movements are beginner level activation movements to help to mobilise you joints and active your stabilisation muscles aiding you in avoiding injury as a warm up at the start of your training period. Do not stretch as part of your warm up!
Once you are comfortable with this level of exertion it is time to start gradually increasing the loading of your brisk walks, start with a small light backpack. The weight of this can only be judged by you, pick a weight that will be a challenge but that will not injure you. We will start with 5kg or 11lb and begin with your starting distance of 5000 steps again. Build up your step count each day to the point at which you are comfortably walking quickly with the 5kg up to 7000 steps, then increase the weight and repeat the distance increments again.

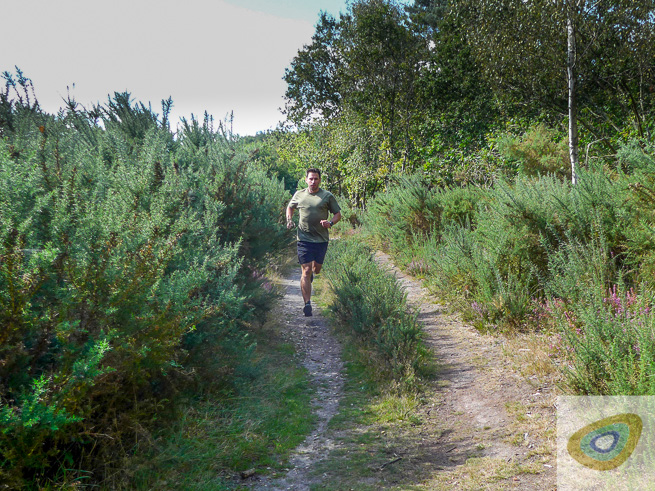
Jogging and Running
The next step after you are comfortable at completing the brisk walks without and with a backpack is starting to jog. This for some people may be a daunting task and any excuse or reason can be made to not do it. But persevere! Start slow and short, do what you can and be proud of each extra increase in distance or decrease in time. The work will pay off.
Let us start with 1-2km distance as a goal. To begin with you might jog a short distance then walk for a bit then jog again. This ís fine, just keep doing it. Below is a basic schedule for jogging.

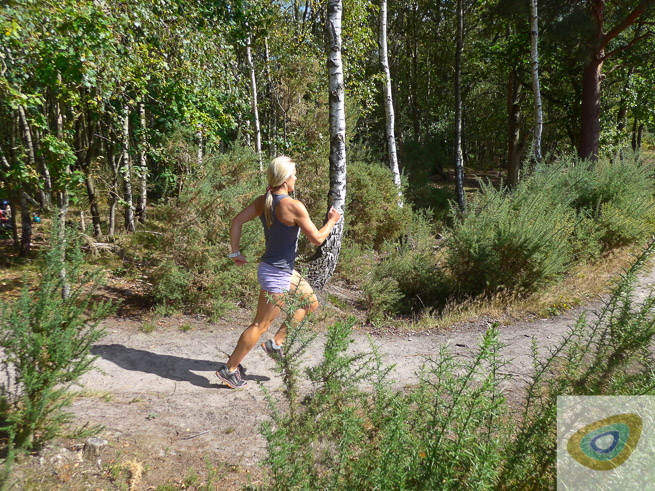
Once you have completed a few weeks of light jogging you should feel pretty good and will be ready to increase your distance. A good way to start doing this is to do interval training. Interval training is a bit like the jog, walk, jog, walk method used to start jogging. But this time try to keep jogging continuously then try running for 20-50 meters then switch back to jogging. When you have recovered enough do this again. I suggest trying a 20 minute jog and getting 10 sets of running intervals into this session.
Remember that this article is just a guide, and each training session you do is personal; just try to push yourself a little more out of your comfort zone than the last training session you complete. If you’re jogging in the park or in the woods, or in the gym, ignore the other people. Maybe they are running twice as fast as you but that doesn’t matter. You have to start somewhere. Tour training and fitness progress is personal and something to take pride in. It may be really hard to start with but nothing worth doing is easy. The hardest part is starting the routine, once you have begun you will start to see results and want to push on with your training.
Swimming
Swimming is a great way to exercise, firstly the water is partly load bearing so you are less likely to get injuries, it helps mobilise your joints and it work pretty much every muscle group in the body. If you can’t swim that is fine, get some lessons at your local swimming baths (DO NOT GO WILD SWIMMING OR SWIM ANYWHERE AWAY FROM A LIFE GUARD IF YOU ARE NOT A CONFIDENT SWIMMER).
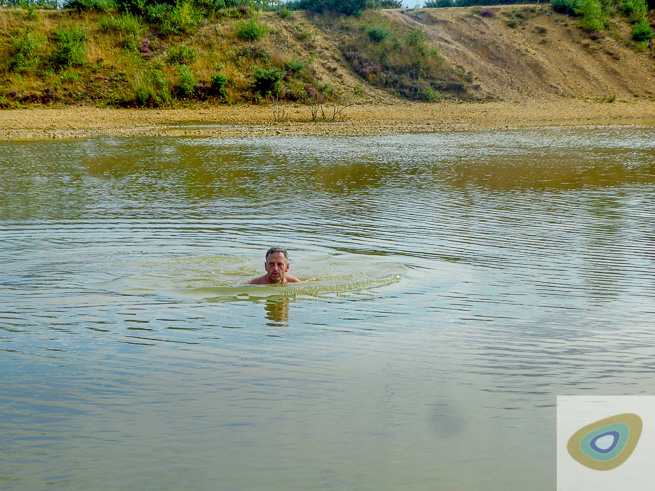
Start swimming in your local bathing pool, if you are trying to learn focus on breaststroke; this is a good beginner stroke and generally the best for the wild, whether you are crossing rivers and lakes or taking a swim while canoeing. You want to keep your head above the water and look out for dangers.

Resistance Training
Resistance training will help you increase lower and upper body muscle strength. The aim of this type of movement is to also help prevent injury during your time in the outdoors. Should you be concerned about your mobility or ability to complete the movements safely without injury then please seek out a personal trainer or advice from you GP. That said these are what I consider to be low impact beginner body weight resistance exercises to start you on your road to a stronger you.
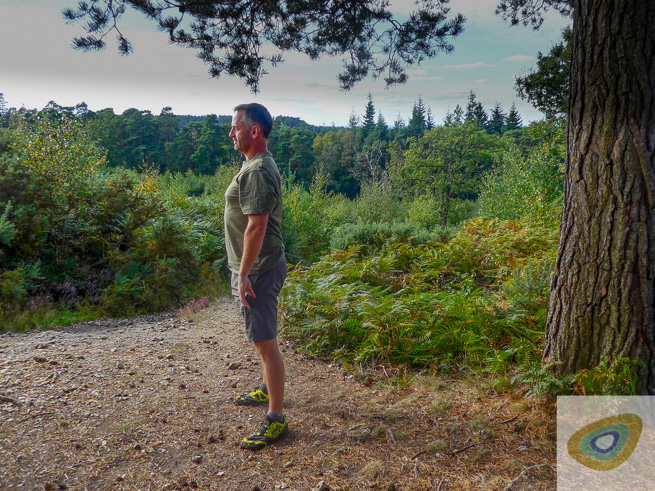
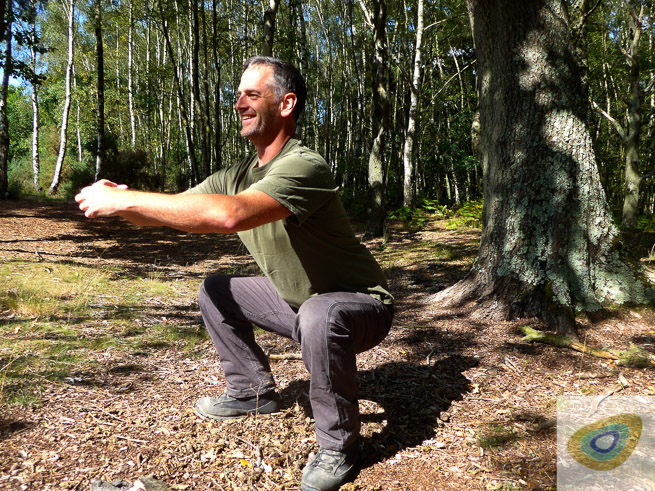
The first exercise is the unweighted air squat. This movement helps to strength the legs and the whole back body chain of muscle groups. Begin by standing up straight on level ground with your feet hip distance apart. It can help if your heels are slightly higher than your toes. Look straight in front of yourself and pick a point to look at, keep looking at this point throughout the movement, it will help you keep your balance.
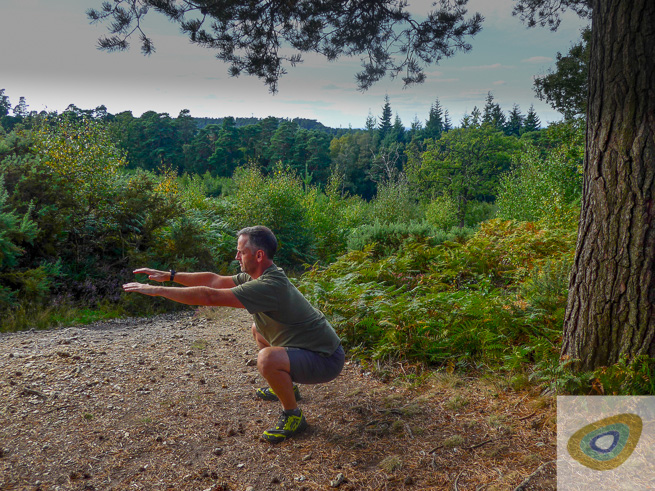
Bend slowly at the knees and hips like you are trying to sit down on a low chair, to start with you can practice this exercise using a chair. Sit back into the chair and then stand up again without using your hands. At the bottom of the movement try to keep your knees inline over the front of your feet, this will help to protect your knees, hold your arms out in front of you to aid balance. Carefully stand back up again and press your hips forward to complete the movement. At the end of this section will be a table to give you a guide of how many repetitions to complete of each movement.
The next movement is a high plank. This exercise is one of the best for increasing core strength. To begin with a full high plank can be beyond some people’s ability, but you can start with your knees on the ground and work up to a full plank. Begin lying flat on the ground with your hands on the ground either side of your shoulders and press up into a flat control plank and hold your shape. Experiment with how long you can hold it for and the different heights you can achieve, start slow and look after your lower back and wrists during this exercise.

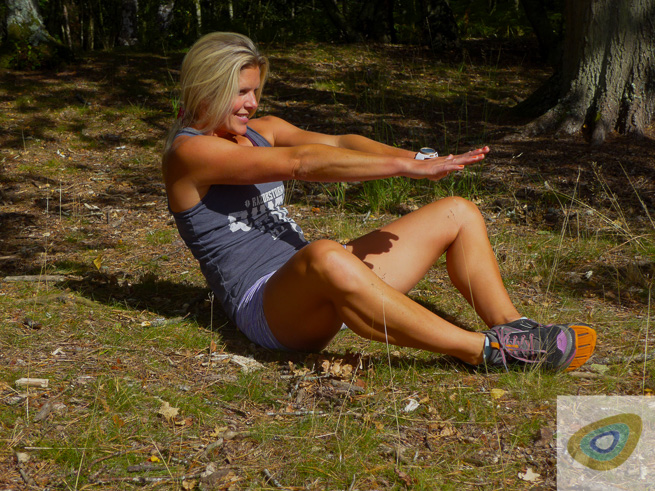
The next movement is the sit up. This body weight resistance exercise helps to strengthen the core muscles around the abdomen. When your core is strong it will protect your lower back from injury which is one of the most injury prone areas of the body along with the shoulders. During this exercise care must be taken to not injure the low back before the core is strong enough to support it. Start with a small range of movement and focus on mentally trying to bring your lower ribs towards your hips during this exercise.
Begin with your hands on your hips and slide them up to your knees. Once you can do this without discomfort in your lower back then you can increase the range of movement and even work up to stretching your arms up above your head while you carry out the exercise.
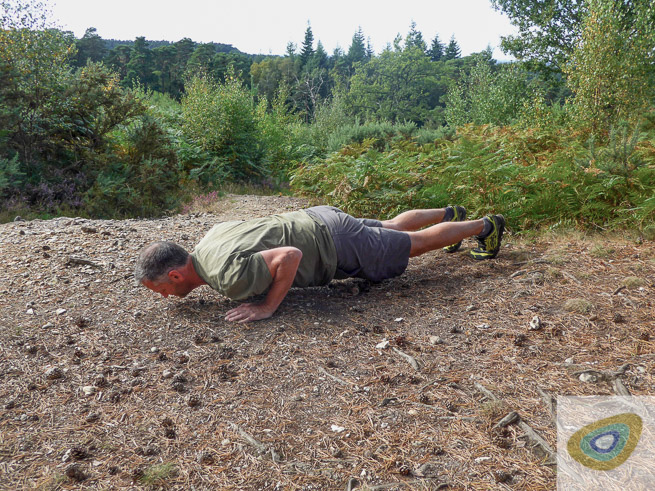
Press ups help to strengthen your chest, back, core and arms. It is one of the best body weight movements you can perform and needs no equipment. To begin with, start in the all fours position with your knees and hands on the ground, bend your arms to a point that you can recover from and then straighten your arms. If you can do a full press up, go ahead. This begins in the plank position, then lower yourself down half way, three quarters of the way or all the way to the ground. The humble press up has a vast array of variations and ways it can be performed. Look to the next articles for some of these.
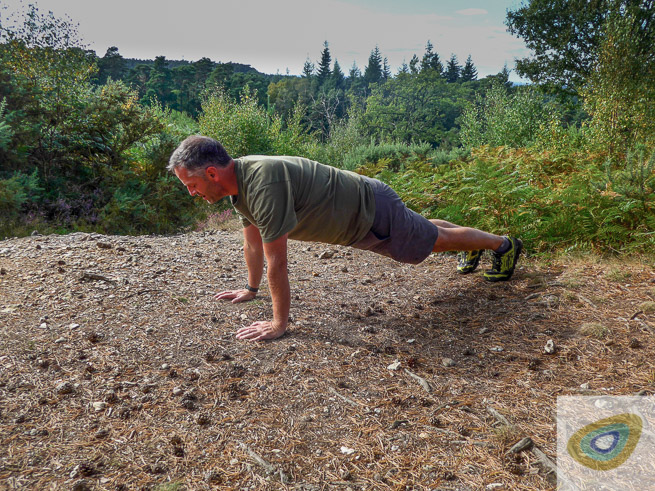
The goal is to do 10 push ups of good quality without a break, but to start with you may only be able to single push ups. That is fine, just do what you can and work up to your end goal with the aim of not getting injured but still progressing. Listen to your body; it knows what it is doing.
The unweighted lunge is a mix between a resistance exercise and a stretch depending on how you perform it. The movement helps to strengthen your thigh, calf and core muscles. Begin standing up straight then step forward and sink into the movement bending at your front knee until your back leg is bent with your back knee just off the ground. Push back up to the standing position using your front leg and assist with your hands by pressing on your knee if needed.


Stretching and Mobilisation
Stretching and mobilisation exercises that extends your muscle fibres, increase flexibility and joint mobility. Including stretching and mobilisation in your routine helps to protect your joints and deceases your chance of getting injures while training or while on an outdoor adventure. It is vitally important to carry out these movements at the end of every training session! If you don’t stretch your muscles while training they will just get tighter and tighter until you pick up niggles or full blown injuries.
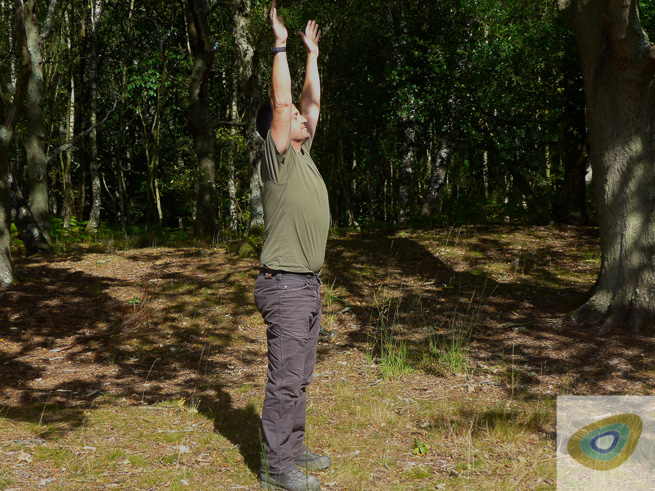
The first stretch is known in yoga as a sun salutation. Start standing with your feet hip distance apart on flat ground, then reach your outstretched arms straight up above your head as high as you can and stand up straight.
Next pivot forward at the hips and bend forward in a controlled way, try to keep your legs straight. If you are new to this movement you can bend at the knees to help protect your lower back.

Keep bending forward as far as you can comfortably go. Stop if it starts to hurt and do not bounce up and down. Try to keep you back straight and hang forward for about 15-30 seconds, then slowly come back up to a standing position and repeat a few times. There are many variations of this movement and it is a very personal movement, what I mean by this is everyone will have their own point they can get to with their hands, you might only be able to reach to your knees to begin with or you might be able to put your hands flat on the floor. The point is to complete the exercise to the best of your ability without injury.
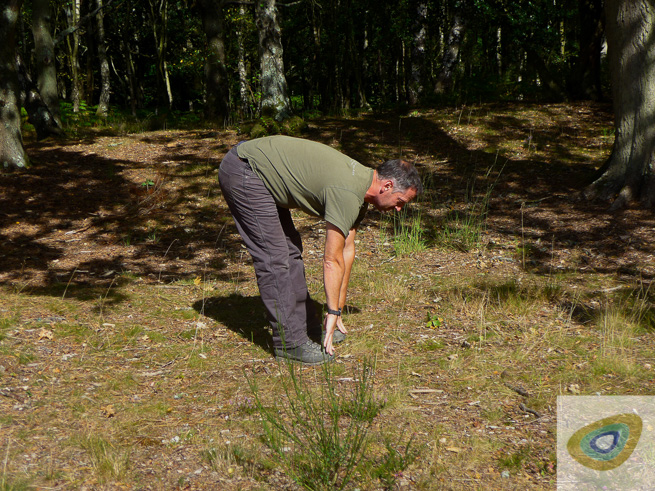
The lowest point of the sun salutation. Photo: Henry Landon.
The next stretch is the assisted back bend against something supportive, be that a wall or a tree or a rock or a strong table. This stretch is very good at releasing tightness in your shoulders, mid back, and hamstrings. Stand one pace back front the support and bend forward until you back is at a 90 degree angle to your legs, or as far as you are comfortable to go. Hold this for 10-30 seconds, come back up to a standing position and repeat a few times.

The squat stretch is personally one of my favourite types of stretches and mobilisation exercises, just like a squat but at the bottom of the movement you just stay there. This movement helps to stretch out all of your upper, mid and lower back and you hamstrings, your gluteals (your bottom muscles) and improve balance through your feet. Sit down into this position as low and as long as you comfortably can; this may only be a few seconds to start with and you might not get very low, but persevere.
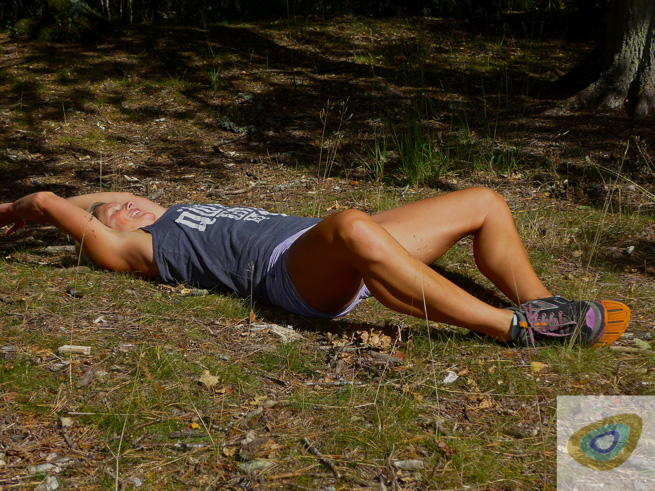
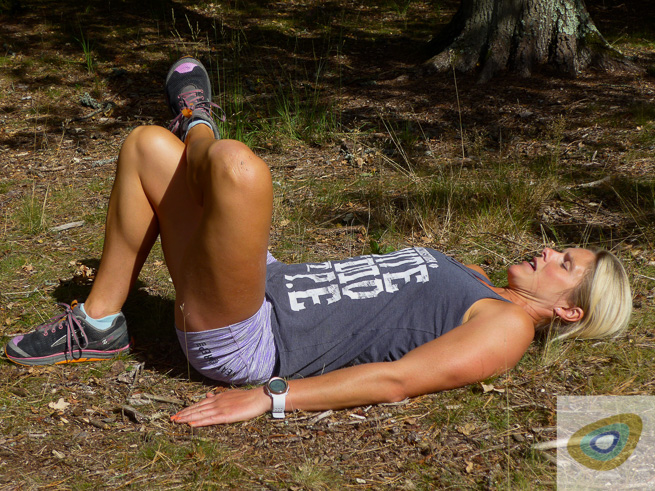
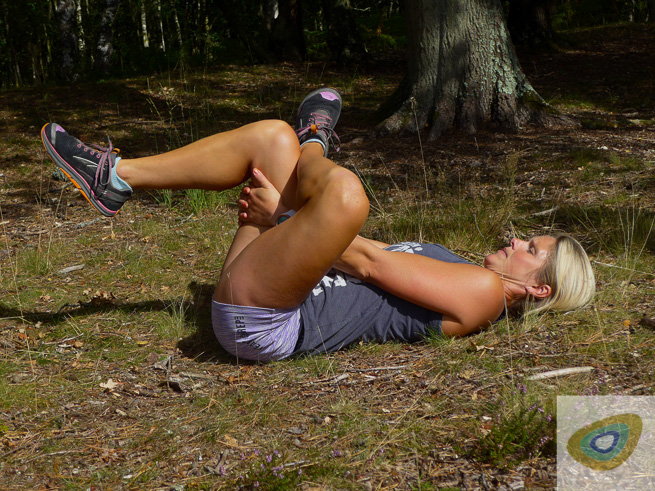
If you struggle with the squat stretch you can try the lying-down gluteal stretch to start with. This stretch helps to stretch out your bum muscles and parts of your hamstrings in a controlled and safe way. Start by lying down on your back with your feet on the floor, and then put one leg up so the ankle of that leg is resting on the knee of the other leg. You can just stay like this and increase the stretch by lifting the heal of your foot that is on the ground up off the ground.
If you are comfortable with this try reaching your hands through your legs and hold onto the back of your thigh, gently pull towards you while still keeping your shoulders on the ground, this will deepen the stretch even more, take care to keep the top leg at 90 degrees to the bottom leg to help protect your knee joint.
The down dog stretch helps to stretch your shoulders, hips, hamstrings, core and calves; basically that is your whole posterior chain stretched in one movement. There are many ways to focus the stretch on different parts of your body, cycling your legs will put more or less pressure on either one, focusing on moving your chest towards your feet will increase the stretch in your shoulders and twisting your hips left and right will shift the focus of the stretch in you lower back and hips.
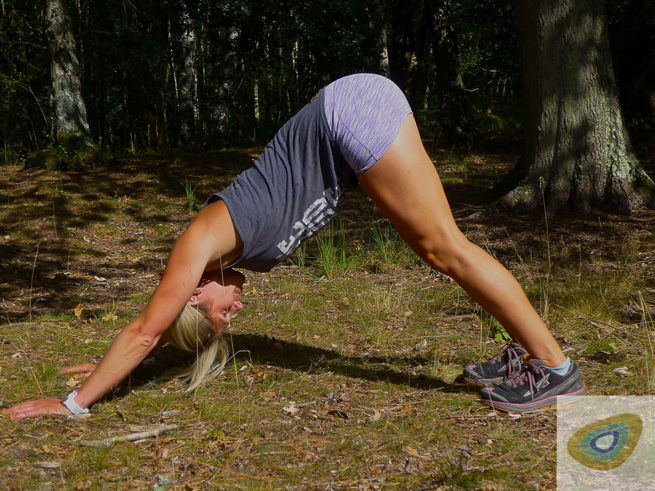
To start with you may not be able to touch your heels to the floor with this exercise, but that is the end goal of a good down dog. Notice in the photo how Michelle has her legs straight, her shoulders down and her heels on the ground; this is the aim for your progression with the down dog stretch.
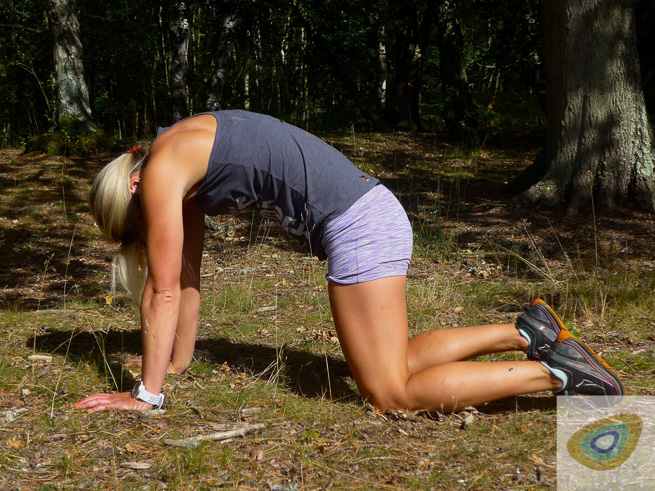
The cat and cow stretch is a general overall spinal ability stretch that will highlight areas of tightness you need to work on further. For example, if you have tight shoulders or a tight core this stretch will show you what you need to focus on.

Start on all fours on the floor and begin by sticking your bum in the air and looking up as high as you can, then breath out and dip your head down and focus on arching your back as high as you can and pull you stomach up as if you are trying to touch your belly button to your spine. Repeat this slowly 10 to 15 times.

The chest-opening stretch is perfect at opening your chest muscles up. You can use a hard surface like a wall, door frame or tree to aid you. First stand up straight and place the inside of your arm against the hard surface, turn your body away from the surface to stretch your chest muscles out. Hold for between 15-30 seconds and repeat on the other side of your body.
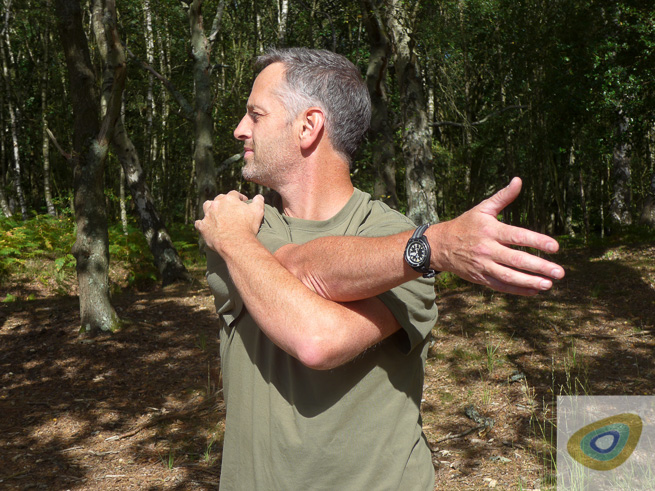
The cross-body shoulder stretch is excellent at opening up your shoulders and the backs of your arms. Place one of your arms across your body level with the ground, wrap your other arm up in front of you and hold the first arm in place across your body. Squeeze in your arms until you feel a stretch in your shoulder and hold this position for 15-30 seconds, repeat this movement a few times on both sides of your body.

The eagle stretch is a great way to open up your upper back and shoulders. First stand up straight, then spread your arms out like a cross then bring them together crossing one arm over the top of the other and wide your arms together with the aim of touching both of the palms together. Pull your hands away from your face and you should feel a good stretch in the front of your shoulders and upper back. If you can’t do this then just go for the first wrap and rest your hands on your shoulders.
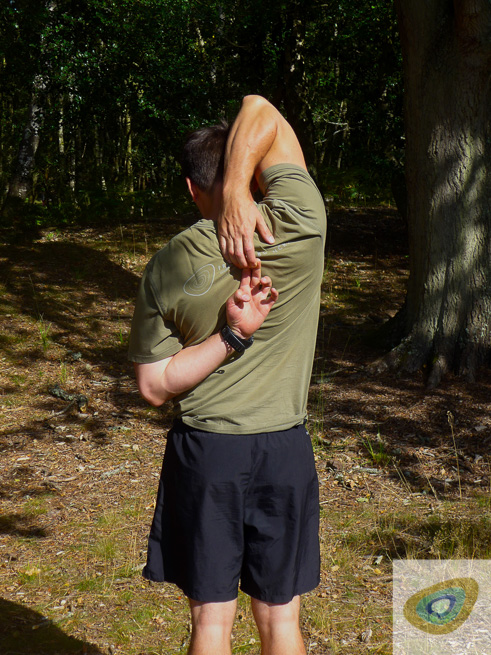
The archer stretch is an exercise that aims to improve the rotation range of your thoracic spine and shoulders. Start by reaching one arm straight up in the air, then by bending at the elbow drop your hand down behind your head so that it is resting at the top of your back. Use your other arm to assist this stretch by reaching up behind your back from below the elbow and hold onto the fingers of the other hand. If you have a very flexible spine and shoulders you might be able to hold onto your wrists, or if you are not so flexible you may not even be able to touch your hands at all, in this case just try to assist the stretch by applying pressure with the other hand pressing down on the elbow from above. Hold for 15-30 seconds and repeat on both sides of your body a few times.
Your Personal Outdoor Fitness Goals
There are three main areas that you will need to work on to improve your personal outdoor fitness levels: Cardiovascular fitness (walking, jogging, swimming), strength training (press-ups, sit-ups, squats, plank, lunges) and stretching. Each set of movements will complement each other and assist you in moving on to the next level of fitness.
Everyone has different levels of fitness and different things they want to achieve; this article is the first of a three part series and is aimed at inspiring and helping to inform readers in their own goals.
Thanks for reading and keep an eye out for the next article, Getting Fit For Your Next Adventure Part 2: Intermediate.
Now, get on with working on your fitness for your next adventure!…
Latest posts by Henry Landon (see all)
- A Springtime Feast: Cooking Up A Treat In The Woods - April 22, 2020
- Getting Fit For Your Next Adventure - April 10, 2020
- The Value of Carrying a Rope While Hiking - June 6, 2017
George Roberts
Really interesting and thoughtful article. Now I just need to put the training to the test…
Paul Kirtley
Thanks George. We hope the article has inspired you.
Warm regards,
Paul
Henry
Hi George,
I’m glad you found the article interesting, thanks for ready and I hope your training for your next adventure goes well,
Cheers Henry
John Zoumides
Awesome read with some top tips. Got me in the mood for some outdoor adventure. Also like the pictorial demonstrations so I know I’m getting the form right. Looking forward to the next article.
Paul Kirtley
Thanks for your feedback John. Henry is working on part 2 as we speak.
Warm regards,
Paul
Stuart Stevens
Great article ….. running is my nemesis !!!…. lockdown has been a great opportunity to improve my physical well-being. Small amounts often & gradually building up is the key.
Henry
Hi John,
Thanks for reading and for your comment, Watch this space for the next article.
Cheers,
Henry
Nick
Super informative article… inspiring style of exercise that a gym could never offer!
Paul Kirtley
Glad you thought so Nick. Thanks!
All the best,
Paul
Henry
Hi Nick
Thanks for reading and I’m glad you found it inspiring, I have tried to make the article accessible to as many people as possible, not everyone has access to a gym but most people have access to an outdoor space.
Cheers,
Henry
Constance Cooper
A really comprehensive and useful article. An excellent read. I look forward to reading the next ones.
Henry
Hi Constance,
Thank you for reading and for your comment. The next article is in the pipe line, so watch this space.
Cheers,
Henry
Dan
Thanks for this Henry & Paul. It’s straightforward, clear and very accessible.
With regard to the reps guide in the resistance training section, is ‘Test Target’ referring to the max one is able to do in that movement?
Thanks again,
Dan
Henry
Hi Dan,
Thanks for reading, I’m glad you found the article clear and accessible, this was very much my aim when writing it, so its good to hear that feedback from you.
To answer your question the “Test Target” is a bench mark amount or goal to aim for; and a way of testing how competent you are at completing that movement or activity.
Say for example you are able to perform 30 sit ups in a row, (and the other Test Targets outlined), your fitness is at a place that will allow you to move on to the Intermediate Fitness level which is coming up in the next article. This is a lose guideline for your fitness level, and a goal to aim for when completing the beginner level fitness.
I hope that helps to answer your question; this should become clearer in the progression I have mapped out over this article and the next two.
Cheers,
Henry
Stuart Stevens
Great article ….. running is my nemesis !!!…. lockdown has been a great opportunity to improve my physical well-being. Small amounts often & gradually building up is the key.