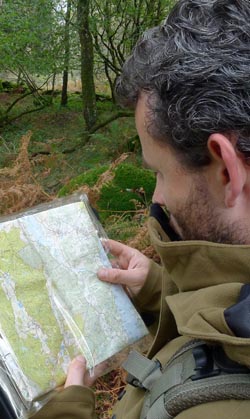
Navigation is a key wilderness skill.
If you are going to travel anywhere in wild country then you need to know how to navigate.
There are various simple, reliable tools you can use to help keep your navigation accurate and consistent.
One of these tools is a speed chart, also known as a timing chart.
What is a Speed Chart?
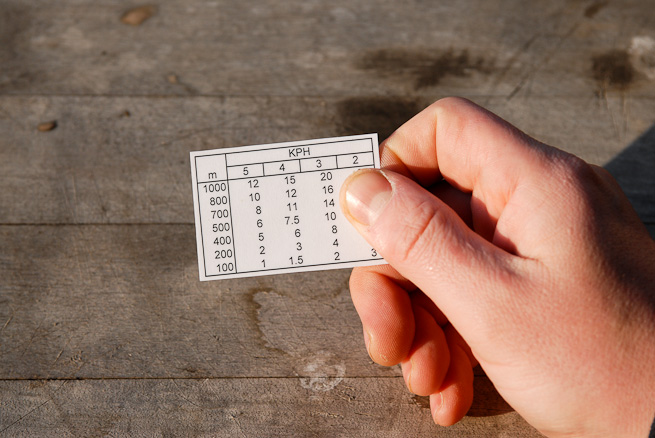
A speed chart is a table of numbers.
It has speeds along the top of the columns and distances down the side of the rows.
We know that speed is equal to distance over time.
So, if we have any given speed and any given distance we can work out the time it takes. This is exactly what we do with a speed chart.
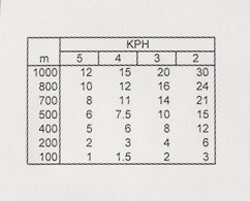
The matrix of numbers within the table are the times it takes to cover the distance in the row at the speed in the column.
Times are typically measured in minutes. In my speed charts I round times to the nearest half-minute.
Why Do You Need a Speed Chart?
If I asked you how long, to the nearest minute, it would take to walk 700 metres at 3km/hr, how long would it take you to do it in your head? Not long?
Now how about if you are tired or hungry? Would you potentially make a mistake?
What if it was blowing a gale and raining and you don’t want to stop for long? Would you even bother to make the calculation?
You can also use your speed chart to answer other questions such as “if we’ve covered 400m in the last 12 minutes, how much distance will we cover in the next 30 minutes at the same speed?”
The primary reason for having a speed chart is so that you don’t need to do this mental arithmetic on the trail. It saves time and it helps to prevent errors.
Of course you might be wondering why you would need to make the calculation in the first place.
In general, being able to calculate timings and speeds is important for route planning. With experience you can look at a map and tell approximately what speed you will cover certain types of terrain. Also you will be able to tell from the prevailing conditions underfoot how fast you will be travelling – will it be a slow 2km/hr or a fairly brisk 5km/hr? This helps get your timings right. How far can we get in one day? How far are we going to travel by lunch time? How long will it take to get to that water source?
More detailed time and distance calculations are also important for your navigational accuracy. This is where your speed chart really helps…
Used in conjunction with good map and compass work, a speed chart is a powerful additional tool.
The more accurately you can anticipate what’s coming up on your route – and when – the better you will stay on track: You will be able to tick off features or landmarks as you go and this will reassure you that you are on track; if you are expecting a landmark or feature in 700m and it doesn’t appear, then either you’ve gone past it or you went off course. Counting paces for 700m is a pain. Timing 14 minutes on your watch is virtually pain free.
One thing that most people are very bad at when they make navigational errors is backtracking. People typically carry on, with the expectation that they’ll recognise something and get back on track. If you look at this situation objectively, however, you are lost and potentially getting more lost by the minute. Knowing how long it’s likely to take you to reach a feature or landmark helps in making sure you reach it and knowing when you’ve missed it.
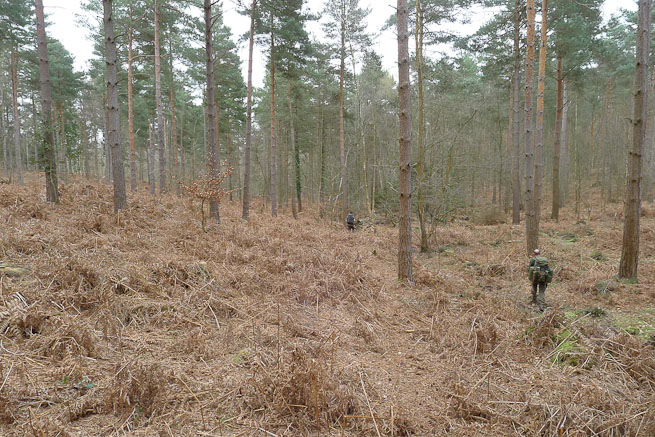
When walking in poor visibility, close vegetation or forest, knowing how long you’ve been walking gives you insight into a key piece of information – the distance you’ve travelled. For this alone, the speed chart is invaluable.
How to Make a Speed Chart
Making your own speed chart is simple. In fact, if you follow this method you’ll have plenty of spares to give to your friends too.
1/ Create the table in Excel or Word. The table will only take up the fraction of a sheet of paper so copy the table so that you have it repeated within an A4 sheet of paper.
2/ Print the sheet.
3/ Laminate the sheet. Laminators are pretty common office equipment these days or you can pick up a basic one in a stationery store very cheaply. They are also useful for laminating other documents or aide-memoires you might want with you outdoors.
4/ Cut out the individual tables, leaving as much border as possible:
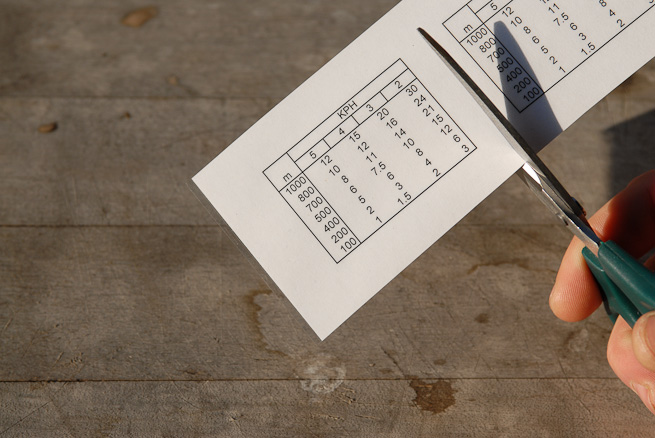
Now you have a laminated speed chart that you can use while out and about. This can be stuck onto the back of a map or inside your map case.
I carry my speed chart with my compass and I think this is probably the best place to keep it – with your main navigational instrument. There are a couple of ways of keeping your speed chart safe and secure along with your compass…
How to Attach Your Speed Chart to Your Compass – Two Simple Methods
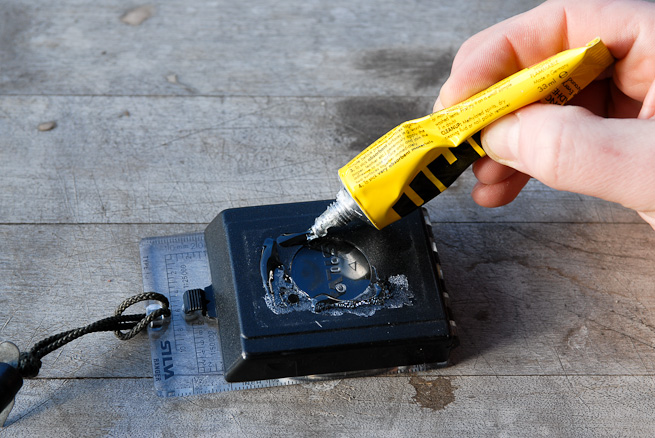
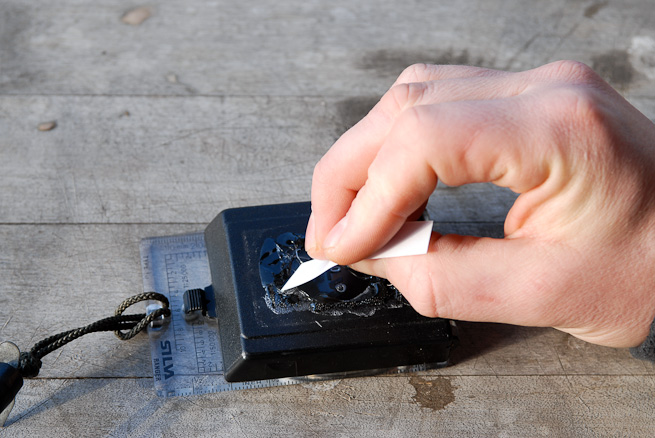
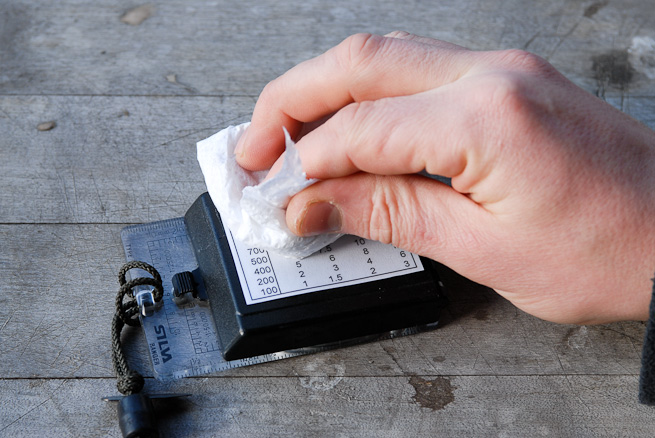
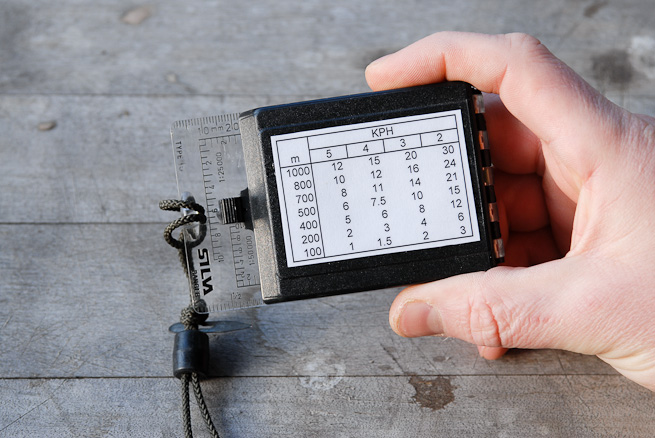
Method 1 – If you have a compass with a lid such as the Silva Expedition 15:
Method 2 – If you have a baseplate compass such as the Silva Type 4:
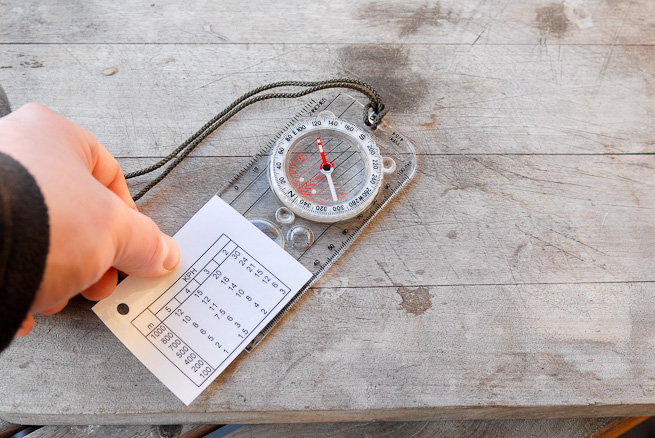
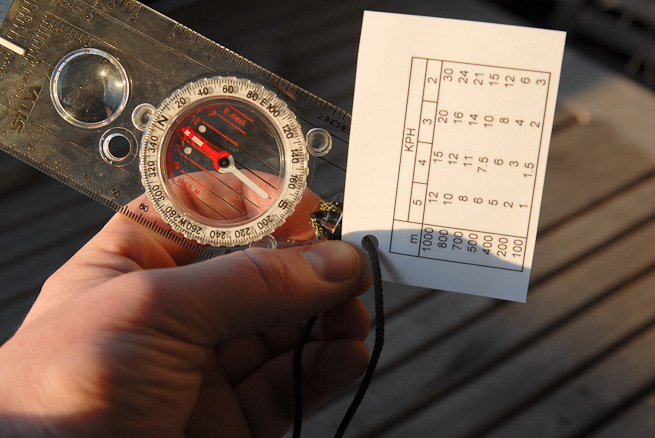
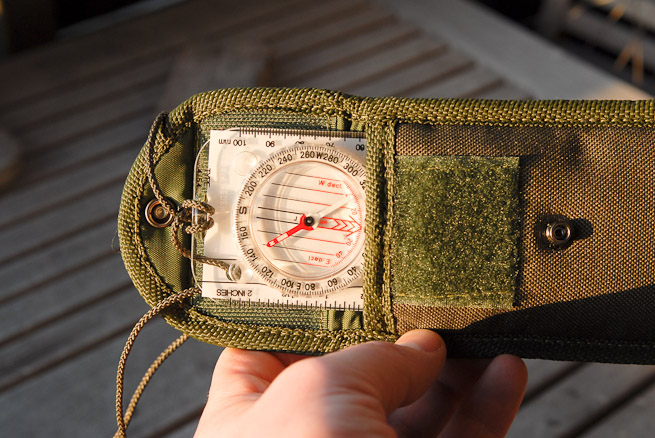
Attaching your speed chart to your compass in one of the ways depicted above means you’ll always have both with you when you are navigating.
Do you already use a speed/timing chart? If not, are you going to make one and try it out? Let us know this or any other thoughts in the comments…
Latest posts by Paul Kirtley (see all)
- The Swedish Firesteel - January 5, 2023
- Kevin Callan and Paul Kirtley in Conversation - April 25, 2020
- Kevin Callan and Ray Goodwin in Conversation - April 18, 2020

wynffordd
I have used one for years but i also use it with a raf loading chart which allows for bergen weight andfitness levels
Paul Kirtley
Hi Wynffordd,
Good to hear from another speed-chart user. Interesting re the loading chart too.
All the best,
Paul
Elen Sentier
Yay, good idea but I need the fitness/loading too as I’ve got rheumatoid arthritis and osteoporosis just to help me along :-). Not sure how I calculate those in but getting head round it – worst case scenarios as well as averages. Suspect that would happen too when cold, wet and with blisters!
Paul Kirtley
Hi Elen,
I’m glad you like the idea. Don’t get too caught up in complicated calculations or adjustments. For example, Tranter’s Variations to Naismith’s rule are horrible (IMO).
If you know you are a slower-paced walker, you can account for this using your speed chart – just assume a slower speed (say 2km/hr) and work all your timings off that.
All the best,
Paul
Dave
Thats really great Paul, im going to make one of these soon. Cheers
Paul Kirtley
Hi Dave, glad you found it useful. Let me know how you get on with using your chart.
Cheers,
Paul
Charlie
I have difficulty with the metric system. How do I convertmeters to yards, and km to miles?
Mark H
Very useful , another great idea !
Paul Kirtley
Thanks Mark!
Dark Horse Dave
Useful tip as ever Paul.
You do point out that you can use the chart to calculate speed (eg when you know from the map that you’ve covered 500m and you know from your watch it’s taken you 10 minutes say), but I’m wondering if the chart could be supplemented – say on the back of it – with an aide memoire to calculate speed over different terrains – I’m thinking basically of Naismith’s rule.
Keep ’em coming!
Paul Kirtley
Hi Dave,
Good to hear from you and thanks for your comment. The speed chart is also used to estimate speeds over terrain in the same way that Naismith is used to estimate speed over different terrain.
You can of course also use Naismith’s rule but the disadvantage with Naismith is that you have to make two calculations – one for the horizontal component and one for the vertical component.
The metric version of Naismith is 5km/hr + 0.5 hrs/300m of ascent or put slightly differently, 5km/hr + 1 minute/10m of ascent (the latter is more handy if your map has 10m contour intervals).
For those who would like an example – if we walk a horizontal distance of 1km and ascend 180m, according to Naismith it will take us 12 mins (at 5km/hr) + 18 mins (at 1 minute per 10m) = 30 minutes.
With experience, you can look at a map and know at your current fitness level that a section over terrain such as that is going to slow you down to around 2km per hour. Looking at the speed-chart, this then tells you that 1km (1000m) is going to take 30 minutes at this rate.
It’s horses for courses though. Both calculations will get you to the same place.
Personally I find I use Naismith a lot more when planning a route, particularly for multi-day hikes. This way you can ensure you are not being too ambitious, that you can make the water source for lunchtime or the proposed campsite you’d like to reach before nightfall.
I break the route into sections and enter the horizontal and vertical components, along with grid references into a spreadsheet. I then write Naismith into a formula and the spreadsheet does the calculations for me. I can then also test different options for the routes and all the timings just fall out. Once you finalise the route plan, you can also take a copy with you as a route card as well as leave a copy with a responsible person in case you don’t return.
Thanks for your comment Dave – keep ’em coming! It helps stimulate an interesting discussion…
All the best,
Paul
Ian Shankland
I have a Silva baseplate compass and can forsee a possible problem with the attachment method. However its easily rectified. If a paper or card sheet has the hole punched before it is laminated you can then make a smaller hole through just the laminate and prevent water ingress which would otherwise make the ink run on the speed chart. Just a thought. Otherwise a very useful tip. Thanks Paul, Ian.
Paul Kirtley
Hi Ian, good to hear from you. Yes water ingress does eventually occur, whether the chart is attached to the top of a lid or to the lanyard of a baseplate compass. Over time this tends to make the chart de-laminate at the edges. But it is a relatively slow process – each chart lasts several years on my compass before I have to replace it.
I like your idea of creating a smaller hole to limit water getting in through the opening. I’m guessing that printing onto waterproof paper might be another option – has anyone tried this?
Thanks and all the best,
Paul
Tim Culkin
Hi Paul, I use waterproof paper regularly to print maps of an area I’m visiting. I find it much more convenient to carry one or two A4 sheets instead of a map and case or the ridiculously bulky laminated maps….I love the stuff.
I’ll be printing a speed chart this morning now too, great idea!
Regards,
Tim.
Toby
Hi, definatelyn going to trial one of these. To stop water ingress cut the table to size, laminate it and then cut away the table down to size leaving as big an edge as possible. the laminate will create a watertight seal.
Love the articles!
Toby
Paul Kirtley
Hi Toby,
Yep that’s another option – more laminating material used to produce one table but a longer-lasting table as a result. Go for it!
All the best,
Paul
Terry Halls
I agree that it is best to trim the chart before laminating, and punch through the clear area. You could add a thin ‘washer’ of plastic at the hole area to reinforce it as well…
Terry
Paul Kirtley
Hi Terry,
Yep a washer would certainly add to durability if you are using this method. Good idea.
Thanks,
Paul
sean fagan
Hi Paul,
loved your article, the speed chart is something I will be field testing a lot in the near future (this weekend!). Can I ask you, what is an acceptable margin of error, timing-wise, when using a speed chart (especially when taking into account terrain that is varied underfoot with variable steepness etc.). In essence, I am asking, when you use your speed chart – in challenging conditions – how accurate have you found it? down to the minute? Personally, I find Nasmith’s rule very accurate on flat sections but not so much on steeper ground (can occasionally be out by a few minutes on longer sections). These are probably impossible questions to answer, and can probably be only answered, at a individual level, through extensive hands-on experience, so apologies in advance for being a little pedantic. Keep up the great articles, Sean.
Paul Kirtley
Hi Sean,
Good to hear that you like this idea.
Acceptable margin of error? Well, with practice, you become more accurate. A lot of it is down to estimating how fast you will travel over certain types of terrain – so you need experience on the terrain and experience in estimating. This is an iterative process but one that only requires a few iterations for you to get pretty good at it.
Initially I would recommend practicing over relatively short legs (20-45 minutes) on varying terrain in good visibility. You can then just walk, time yourself and then calculate the speed you went. Next time you come to that type of terrain in the same conditions, you will have a reference point based on experience.
When making estimates, remember to include time taken to stop and read the map, etc. This is why, initially, to get a good baseline it’s good to have an uncomplicated route in good visibility, to work out your baseline walking speed. Remember also you’ll be faster with a day pack than you are with a full backpack with a week’s worth of food…
You should be aiming for an accuracy within a few minutes, certainly within 10%.
Let us know how you get on with it this weekend 🙂
All the best,
Paul
sean fagan
Hi Paul,
have to admit – the speed chart was great when I used it last weekend. Thanks for offering such excellent, specific advise – much appreciated! I don’t know why I never used a speed chart before!!! great stuff!
Paul Kirtley
Hi Sean,
That’s great! So glad it was useful to you.
Cheers,
Paul
Chris Leeland
I have used a cruder version of this for some time and found it very useful. As you say, it is much easier to judge time than distance. Your version is better.
The only addition I can suggest is that as my (baseplate) compass doesn’t have measurements/scales on it that I find helpful, I have added a line at the edge of the card showing 100 yards/250 yards etc at the scale of the map so that I can more easily measure on the map how far it is that I need to walk to the next waypoint/feature.
Also I had it attached to my map case not my compass (to make it handy for measuring distances – see my mod above), but it was on a longish piece of string and so tended to get tangled up. A short bit of string attached to the compass looks a better idea.
Paul Kirtley
Hi Chris,
Good to hear from you and thanks for your comment.
I like the idea of the addition of a scale to the card when the compass baseplate doesn’t have one. This is a tip I’m sure others will find very useful.
Thanks and all the best,
Paul
Kevin Gullick
I made these some time ago for all my scouts. I laminated them to keep them from the elements as you can never guarantee fine weather. They are a great help to them when working out their timings and distances when planning hikes. They keep them to hand with their compass if needed along the way. I also did a similar thing with Naismiths Rule, enabling them to calculate timings when confronted with mountains, valleys, hills and troughs.
Paul Kirtley
Hi Kevin,
Thanks for your comment. It’s great to read that you’ve made these with your Scouts. And they’ve actually used them. It’s a good point you make that a speed/timing chart can be useful at the planning stage as well as during a hike.
How did the Scouts find Naismith’s rule?
All the best,
Paul
Kevin Gullick
At first they found it complicated, but the more they used it, the more they understood. Adding extra time for walking up hill or decending eventually made sense to them. You have to bare in mind Scouts ages, from 10 yrs to 14 yrs. Some grasp the concept easily, but others may take a while. Its all good practice, sometimes better learned out and about on the hills rather than in a classroom environment.
Paul Kirtley
Kevin,
It’s great that you are introducing these concepts to them. I remember a lot of what I was told and shown when I was in Scouts at that age.
I agree that while a classroom understanding of these methods is a useful foundation, that practical application is really what solidifies the techniques and tools of navigation.
All the best,
Paul
Richard
Sound advice, as always.
I find my speed card invaluable but one shouldn’t forget the other factors that can affect your speed. I follow the rule that if you’re carrying a heavy load (anything between 10kg and 20kg), you should subtract 1 kph from your speed; in darkness, halve your speed; into a headwind, subtract 1 kph or more, if it is a particularly strong wind. I’ve found these ‘little extras’ to be both useful and accurate, both when preparing a route card and also when in the wilds.
I also find pacing (using beads to keep tally) can be a real help when navigating though you do need to concentrate and it doesn’t factor in any variation in terrain that would cause you to shorten or lengthen your stride.
Paul Kirtley
Hi Richard,
That’s all good sound advice and at the heart of it is experience. The more experience people have with applying these tools and methods, the more they will be able to use them effectively in the ways that you have described.
I find pacing requires much more continuous concentration than the use of a speed/timing chart and only tend to use pacing in very low visibility (including at night). I find it very effective over relatively short distances but as you say, making adjustments for pace length over different terrain can be tricky.
You also have to remember that on steep slopes as well as your stride length shortening, the horizontal distance travelled (i.e. the distance on the map) is also less for a given number of strides (trigonometrically-speaking you are walking on the hypotenuse while the distance covered on the map is the adjacent side). Most slopes, however, aren’t as steep as they feel and in these cases the difference between these two distances isn’t particularly significant.
All the best,
Paul.
Carol
Hello Paul,
I have just come back from my first planned walk of 40kms in a couple of days,
and am quite new to compass and navigation skills, and was fortunate to get hold
of a (speed chart) before I went, so was able to plan my route, distance and (speed)
before I went and found the speed chart really helpful, and when a long section
of my route was closed and I had to plan an alternative route I was able to work
out how long it would take me, which I’m not sure I could have done so easily.
Carol
Paul Kirtley
Hi Carol,
That’s great. I’m so glad you were able to put a speed-timing chart to use and it worked well for you.
Thanks for taking the time to share this feedback.
Warm regards,
Paul
Daniel
Hi Paul,
Can you please let me know where you got your green compass case for the silva exp4?
Paul Kirtley
Hi Daniel,
Hmmm good question. I’ve had it for years but I think it was either Penrith Survival Equipment or Silvermans.
Happy hunting!
Warm regards,
Paul
Trevor
I have used variants of this over the years, sometimes with additional columns (in a note pad not on the compass) for different terrain (trail vs field vs forest), day/night (how well can you see to move), load or no load.
Also plotted time/distance measurement on my 1:50 000 scale romer/protractor opposite the distance measuring line. I could see at a glance when measuring the distance how long it would take to cover it on foot using the average speed under normal conditions.
Would also use a grease pencil on the sighting mirror as a “route card” giving my bearing and distance for each leg of a cross country journey.
Dave Welsby
Great DIY and information Paul. Navigation is one of my weakest areas.
Thanks again,
Dave ( welsby roots )
Dave H
Hi Paul
thanks for another really useful and instructive article.
I remember having to plan our night exercises using pace counting and bearings to reach a rendezvous at the instructed time. We used to have to increase the required number of paces as the contour lines tightened on the map. It would have been fantastic to have been allowed to use one of these at the time. I am going to help my son make one of these to attach to his Silva compass. Far easier to look at your watch regularly than count paces.
Keep safe, keep having fun, and please keep sharing your wealth of experience.
All the best, Dave.
Paul Kirtley
Hi Dave,
Glad you like this and I hope your son does too. Let me know how you get on with it.
I agree with timing being somewhat easier than pacing but the two together are a powerful combo.
I find I prefer pacing for short legs of say up to a few hundred metres. It has the pinpoint accuracy. For longer navigational legs of say more than a few minutes in duration, I prefer timing. In the middle ground the two work well together.
Let us know how you get on with the chart.
Warm regards,
Paul
Nigel Gregory
Hi Paul
Another great article as always, I agree pacing is a pain, I use a speed chart but also use a slope angle gauge when route planning, this allows me to turn a two dimensional map into a three dimensional route thus giving me a true distance and allowing me to compensate time due to steep inclines.
All the best
Nige.
trace
Great article this is one thing I’ve struggled with I know my own speed but get stumped when people ask me how long it will take, so I will be making one of these.