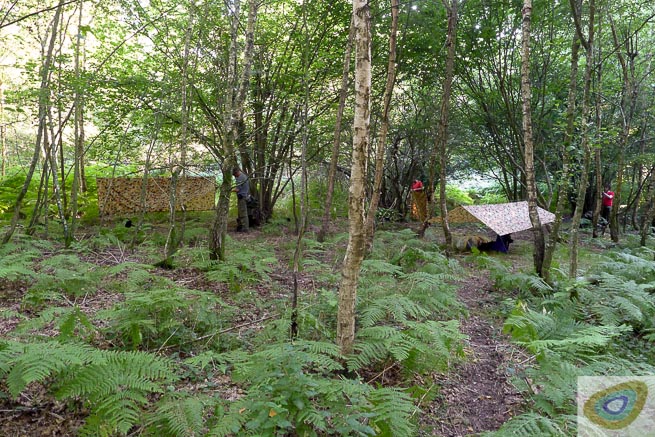
Those of us who are fans of tarps already know they are a versatile and protective shelter.
A tarp made of a modern lightweight material takes up little space in your pack yet creates a relatively large covered area for little weight.
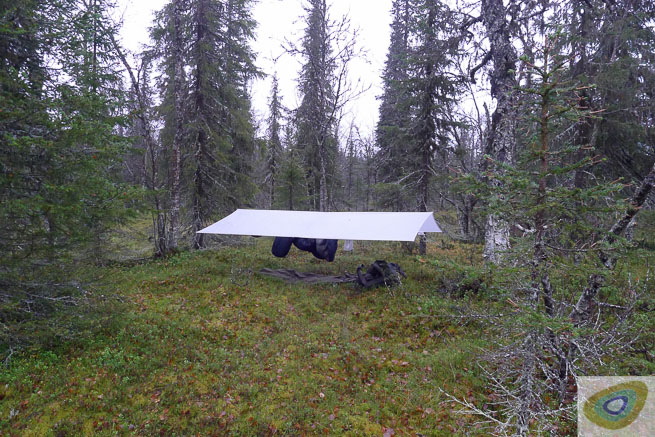
What’s more you can have a fire under a tarp if you pitch it right. You can walk in and out of the sides and you don’t even need to take your boots off to do so.
For all its plus points, though, a tarp is dependent on there being something to attach it to.
Carrying or creating pegs is the obvious solution. But there are other options open to you too.
I look for these opportunities first, before setting out to make any tarp pegs. Not only do the methods below save time and effort when pitching your tarp, they also mean you don’t need to cut green material for pegs unnecessarily.
Attaching Tarp Guylines To Upright Trees
We automatically attach the main ridgeline to trees. Why not look for other trees to attach your guylines to as well? To avoid a saggy tarp and achieve a nice taught surface, you need to judge the angles correctly.
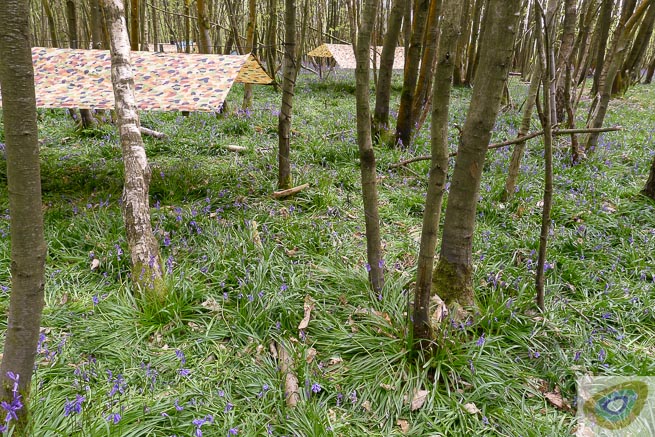
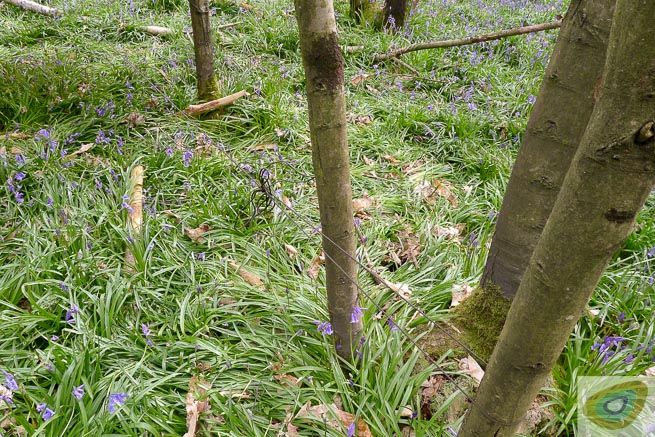
Horizontal Tarp Attachment Options
Don’t just look for horizontal trees, there are many other angles that can be helpful. In fact, they can be more useful in terms of getting the guyline at just the right angle relative to the corner of your tarp, so that you achieve a nice taught surface which sheds water.
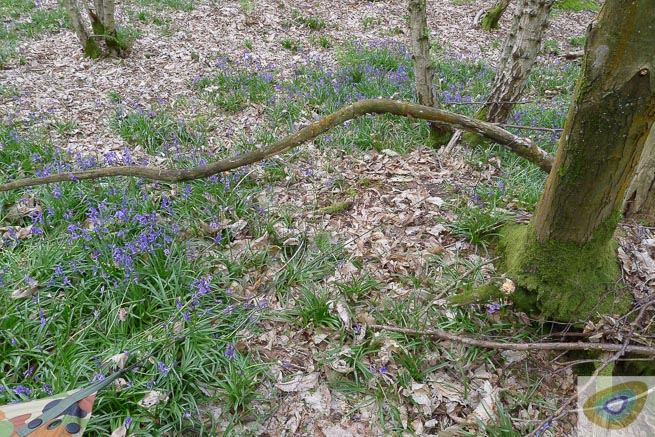
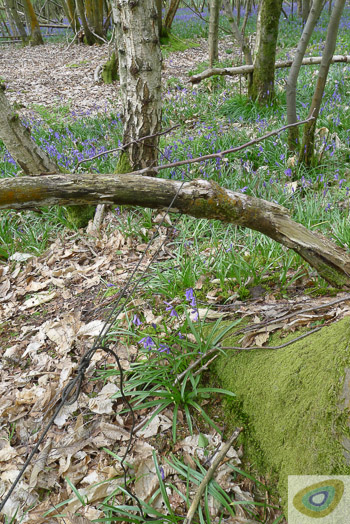
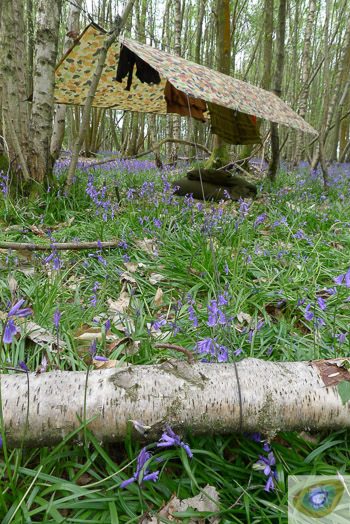
Similarly, in areas which are more rocky, you can also make use of rocks in a similar way.
Look Even Lower For Somewhere To Attach Your Tarp Guyline
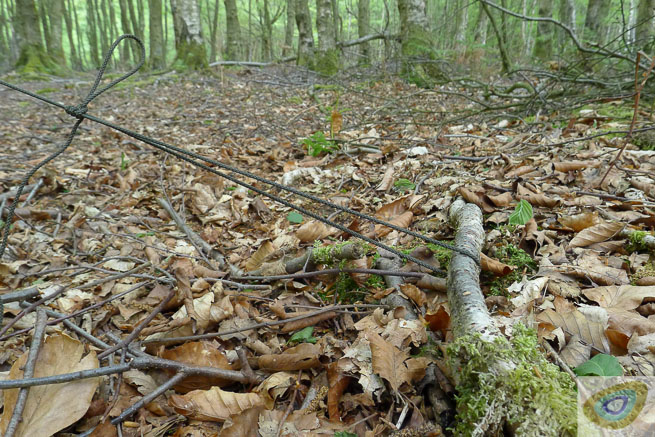
The keen eyed will spot surface roots amongst the leaf litter. Silver birch trees often provide particularly good examples. Don’t go digging and uncovering roots but if there is a natural gap underneath that you can slip the guyline through, why not make use of it as an attachment point?
How To Tension Your Tarp Guyline
The adjustable guyline hitch is very useful for quickly attaching a tarp guyline by looping it around a fixed point and then creating a friction hitch which is also quick-release.
If you don’t know how to tie this knot or need a refresh, have a watch of the video below…
The combination of being able to tie the adjustible guyline hitch quickly and having a keen eye for the available attachments points, will have your tarp pitched in extra fast time.
Let us know if the above tips were useful? Also, let us know if you’ve used attachment points you’ve other than just plain old pegs.
Latest posts by Paul Kirtley (see all)
- The Swedish Firesteel - January 5, 2023
- Kevin Callan and Paul Kirtley in Conversation - April 25, 2020
- Kevin Callan and Ray Goodwin in Conversation - April 18, 2020

Jason
Thanks Paul,
Another great video, I have set my own tarp up exactly as Frontier showed me. It is extreamly efficient to deploy and re-pack. These “bite size” videos are great reminders for my rusty memory.
Julian Cresswell
Thanks Paul,
Simple and very useful.
I use a similar knot called a Farrimond hitch apparently named after its creator, an actor from the BBC series The Archers!
Julian
danny
great blog and vid paul,big thanks for taking the time to do it.its came at the right time for me as I have to practice my tarp knots 🙂
Peter Nex
Great Video Paul, very easy to see there, I use it on all my set ups as I find it the best in any situation and allows for use in high winds and driving rain conditions excellently holds and adjusts. I often use surround tress and branches to tie off on my tarp and stuff mainly through ease and slight laziness rather than saving on pegs though 🙂 If nature provides it I’ll use it 🙂
Paul Kirtley
Hi Tinky Pete, good to hear from you. Glad you are on the same page with this 🙂
All the best,
Paul
Kevin
Thanks for sharing Paul.Great videos !
Paul Kirtley
My pleasure Kevin 🙂
Neil Rhodes
ohh thanks thats a gem. Im doing it all wrong, figure 8 slip knot and just tie it off 🙁 now ill look the pro next time im out with the lads on a micro adventure!
Paul Kirtley
Hi Neil,
Glad you like it! I’m sure you’ll find it useful – both for a faster, slicker camp set-up and take-down as well as impressing your mates 😉
Have fun.
Paul
James Gohl
Hi Paul,
Here’s another trick. To secure your tarp to the ridge line, simply make a loop in the ridge line and poke it through the tarp’s center grommet, then use a stick through the loop to secure it.
Jim
James Backhouse
Hi Paul,
An extremely helpful video indeed as always!
James.
Paul Kirtley
Thank you James.
Warm regards,
Paul
Paul Kirtley
Thanks James. Glad you found this one useful too.
As always, best,
Paul
Rody Klop
Use a second line under the tarp, so you can hang (important) things. Like towell to dry, headlamp, etc. No mess on the ground and still easy to reach. Make sure you pay attention to the guylines, so nothing snaps (tarp attachment point, your leg or the string.)
Paul Kirtley
Hey Rody,
I manage to get everything I need on one line but, yeah, for the sake of an extra length of cord in your pack, why not? You gotta make it work for you 🙂
All the best,
Paul
bill jackson
Useful article. Nice suggestions on knots and on effective angles. Most people have problems with the latter.
Previous articles have stressed the need to collect sufficient dry fuel before starting your fire. In rain, the wood will get wet as you collect it. So you need a dry place to put it. If you’re having an unexpected night out and night is approaching, there may not be enough time to both build a small shelter and collect enough fuel. Even a very small tarp will eliminate that problem.
Paul Kirtley
Hi Bill,
It’s good to hear from you. Thanks for your comments.
You are absolutely right about the value of a tarp in your day pack – something I’ve written about over on my personal blog.
Warm regards,
Paul
Lillian Schaeffer
This is some great information, and I appreciate your point that a tarp is a lightweight way to create a form of cover. My fiance is really into camping, and I’ve found that I have an interest in the outdoors as well, though not as much experience. We want to go on a backpacking trip, so I’ll definitely talk to him about using tarps for cover instead of a tent so we can keep our packs lighter. Thanks for the great post!
Stephen Tomlinson
Thanks Paul. I “play out” in a private plantation near my home. The owner knows I’m there and as I explained what I would be doing, practicing putting up a tarp, hammock, using my Nano wood stove etc. I am allowed to light a “small” fire, with a few twigs and bits of dead wood. But it allows me to practice “leaving no trace”. I don’t do any cutting of green wood though. There are lots of different types of common trees, you name a common British broadleaf tree and there is one! I can also have the “odd night out”, which is great!
Tying different knots to different things is something I can practice too so this blog will come in handy for when I’m out there next.
John Carragher
Hi Paul,
I find your blogs very interesting and can put to use the information given,you can’t remember to bring everything on a weekend out.The tips you give help over come any problem that arise.
Many thanks,
John
Russell Joyce
Hi Paul, great article as always. I think you’ve missed one thing however – the other end of the guyline! What knot do you recommend to attach a guyline (or a ridgeline for that matter) to the actual tarp? At the moment, I tie an overhand knot in a bight and then loop that through the grommet and pull the working end tight through the bight – loose under slack, tight under tension, but the overhand never has to come undone. The only downside to this is that I have to unravel all the cord and pull it back through the overhand loop if I want to take the ridgeline off or attach it to another grommet – any ideas/suggestions would be welcome! Thanks. Russ
Paul Kirtley
Hi Russ,
With tape loops on tarps, I often use a double sheet bend. I have a video coming out on my YouTube channel – https://www.youtube.com/paulkirtley – on this knot next week. I add a quick release if I want to be able to easily remove the line from the take loop.
Alternatively a bowline also works although I find there is something messy about the way this looks and it uses more cord than necessary. The neatest option for thin lines attached to personal tarps is probably a buntline hitch. In the context of using it on a tarp, I guess that’s another video I need to add to my list to make….
All the best,
Paul
Wayne Knight
Another great and useful tip video, do keep these coming, they’re fantastic as quick reminders as when trying to recall everything when not always able to put into practice regularly what we’ve learned.
regards,
Wayne
Paul Kirtley
Hi Wayne,
It’s good to hear from you. Thanks for your feedback on these posts. I’m glad they are proving useful memory-joggers 🙂
Warm regards,
Paul
Laurence Hallett
Clean and simple – and great for tactical use as well. Military Forces could do well by using this as THE standard knot when deploying into tactical harbour areas to put up ‘basha’ shelters. Well done!
Dave Foster
Hi Paul, sorry for the basic question: In your experience, what lengths of lines do you recommend or think are most useful for corners, sides and ridgeline (if you’re not using a separate dedicated line for that). Additionally, do you ever use any lighter weight dyneema cords for your lines? I’d be using a relatively small tarp like your rab siltarp 1 or a zpacks 7 x 9 foot DCF tarp that I’d like to be able to fly high like you do, or potentially half pyramids closer to the ground. My initial thought is ~2.5m for corners and sides, ~3.5m for ridgeline on each side.