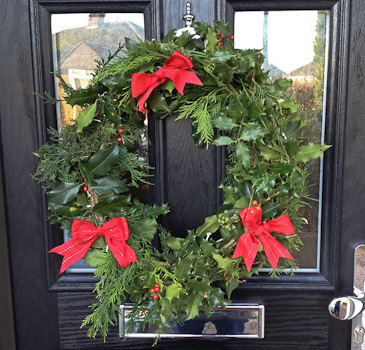
People have made wreaths from natural materials for thousands of years and we use one on our front door to mark our celebration of Christmas.
It’s become a family tradition in our home to go out into the woods at the start of December and collect the materials required to make a wreath to decorate our front door.
Creating your own wreath makes for an enjoyable and attractive seasonal craft project. It’s also one that can involve children of the family, both in collecting materials and assembling the wreath.
Disposal of Your Wreath
It might seem a bit strange to start with disposal but its worth stating at the beginning, we make the wreath to be easily disposable at the end of the festive period.
The wreath either goes into the recycling bin or onto the drying pile for kindling. With that in mind I ensure that it’s only made of biodegradable materials, save the bows which my wife likes to add at the end.
If you want to make one and keep it out of landfill then you’ll need to think about this when getting the materials together.
What You Will Need
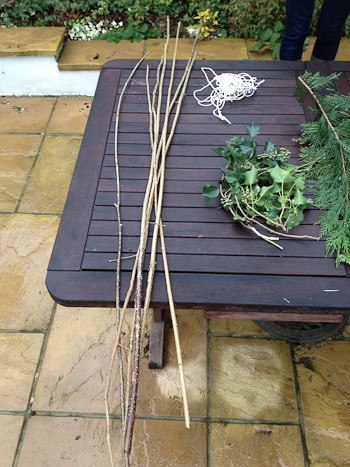
Tools:
- Knife or strong scissors;
- Garden shears;
- Gardening gloves;
Materials:
I like to include plants we associate with Christmas such us holly and ivy but it’s really up to you what materials you use for a wreath.
You will need:
- Something to create a base structure – hazel or willow shoots are ideal;
- Material for the ‘body’ – ivy, holly, conifers or similar;
- Biodegradable string;
- Something to add colour – e.g. ribbon;
How to Assemble Your Wreath
Step 1
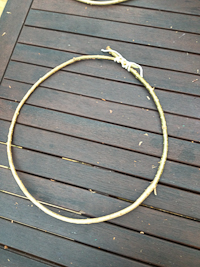
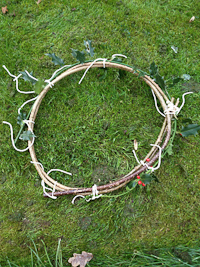
To make the base structure take one of the shoots – I used hazel in this insnace – and gently bend it to ease the material into a circle.
Then tie it off to complete the hoop.
Then add another shoot of hazel, bending it as you go, and tie this off to the already-formed hoop at about 4 or 5 points all the way round.
A good tip here is to leave good long tails on all of your knots, you can then use the ‘spare’ later when attaching more material.
Step 2
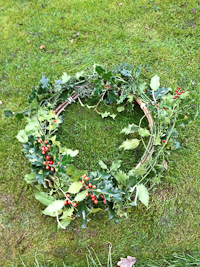
Now we have a base structure we can begin to build up the body of the wreath. What I do is simply tie on Holly all the way around, one piece at a time.
Then just keep adding more strands of Holly until you have a good thick body of material all the way around.
Step 3
If you haven’t got your gloves on yet put them on now!
The next step is to weave your ivy and conifers into the body of the wreath.
You shouldn’t need to tie these on, just push then through the holly by their thick end and weave in and out through the wreath.
Try to be gentle and not rip all of the berries off the Holly.
Now keep doing this until you are happy that the wreath is generously ‘thatched’. It should look substantial as it will shrink a bit as it dries out.
Step 4
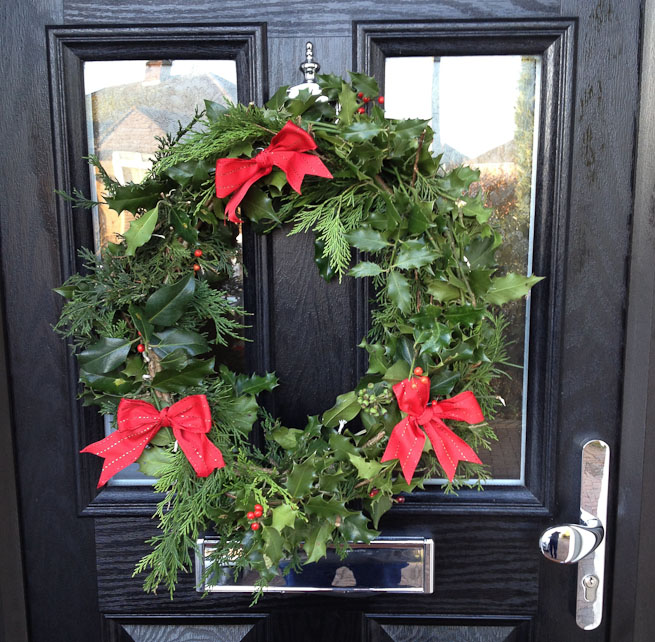
Tie on some bows, add a loop of string onto the back and hang on your front door!
Barry Smith
Latest posts by Barry Smith (see all)
- There’s Something In The Air… - September 29, 2013
- Bushcraft Knife Choice For Children And Young People - April 24, 2013
- Bushcraft On A Budget: Improving The Swedish Army Snow Smock - January 22, 2013

Sandro Ponticelli
Great tutorial!
Barry
Thanks Sandro, glad you liked it. Best wishes, Barry.
Adrian Royston
Great ideas and instructions, they are excellent fun to make with kids, we made them last year with our Bush craft club here in Lincolnshire. The look of satisfaction on children’s faces when they produce something as good as these is priceless and they didn’t cost a penny. The session also taught the children tree ID, tool use and respect of the environment.
Keep up the great articles !!
Can send photos of kids with wreathes if would like
Barry
Hi Adrian, Thanks for your message. We are going to make them with our Scouts this year, hopefully we’ll achieve the same level of delight that you do!
Making your own wreath is much more satisfying and cheaper than buying one.
Take care.
Barry
Dave
Awesome ! great post for the christmas spirit Paul.
Cheers,
Dave.
Barry
Hi Dave, It’s great to be able to apply something from woodcraft at home, this simple project really enables that. Glad you liked it.
all the best
Barry