
Spring is a great time of year to be out in the woods. After a long winter it is refreshing to see all the trees and plants come into leaf. Paul Nicholls (AKA Spoons) and I decided to have a spring time treat and cook a leg of muntjac deer a friend has given us, along with some sweet potatoes, in a pit oven.
Spoons had worked very hard to find a local land owner who would give him access to an area of woodland. In the end it took him two years. You can read more about how to find a place to practice bushcraft in this article on Paul Kirtley’s Blog.
However, the work done by Spoons was well worth it and the small patch of woodland he gained access to gave us the perfect place to spend the weekend and to cook up our spring feast.
A Fortunate Fungi Find…
As a happy accident when we arrived in the woods, the forest floor was covered in morels, which don’t look like the tastiest of fungi but have a beautiful nutty flavour.
[Editor’s Note: A number of edible morels, in the genus Morchella, can be found in the UK, and more still to be found around the world. All edible Morchella should be cooked before eating. Raw or undercooked morels can cause stomach upsets. – PK.].Unlike many fungi which are associated with late summer and early autumn, morels tend to be found between March and April, so keep your eyes out next time you go for a springtime wander.
“Morels have long been prized as one of the most important edible fungi, possibly second only to truffles…” – Roger Phillips.
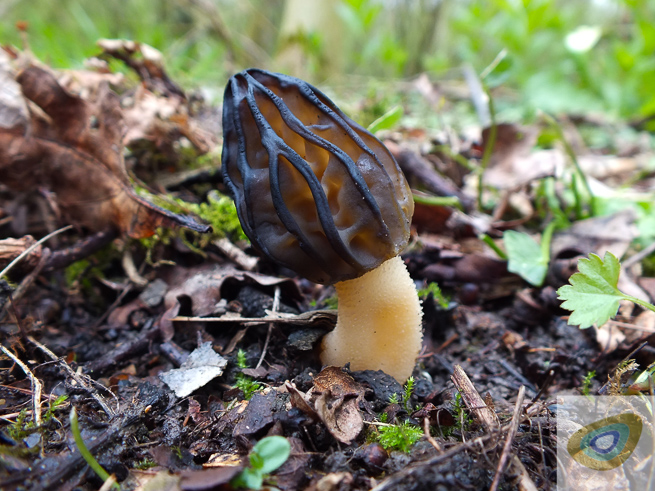
Morels have a widespread distribution but they are not particularly common. These small mushrooms tend to grow in copses, scrubby woodland, wasteland, alluvial forests, grassy woodland edges, old hedgerows, besides footpaths, burned ground, and even in gardens. Morels can be found as solitary individuals but if you are fortunate, as in our case, when you find one morel there can be multiple specimens in one area.

Morels can be difficult to spot amidst the leaf litter of the forest floor due to the colour and texture of the cap. This is usually darker than the stalk and blends into the leaf litter. Morels should not be confused with false morels, which have more of a Yorkshire pudding look to the cap compared to true morels, which look more like a honeycomb structure.
[Editor’s Note: The false morel, Gyromitra esculenta, sometimes referred to as the turban fungus, is deadly poisonous raw. It is generally considered harmful even when cooked or processed. Even with processes that allegedly remove the toxins (boiling in water, then discarding the water), it doesn’t necessarily render the fungus safe to eat; even if there is no evident direct effect on first exposure, G. esculenta possibly causes poisoning cumulatively over time. It is sometimes said that true morels have hollow stems while false morels do not. However, false morels often have hollow chambers in the stems, so don’t be confused by this. – PK. ]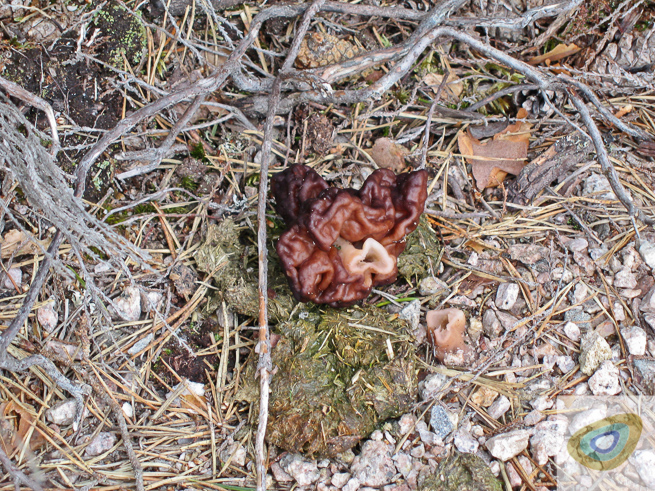
It should be noted this article is not a complete field guide to picking wild fungi, or even morels, of which there are many species. Rather, this article is an account of an experience. If you are not experienced in fungi foraging, then it is best to get some training in person from someone experienced and qualified to share their knowledge. And remember always follow the sensible forager’s mantra of “If in doubt, leave it out”. Read more on this site on how to learn about fungi safely.
Fungi Guides Recommended By Paul Kirtley and Frontier Bushcraft Team

On The Lookout For Other Springtime Edibles
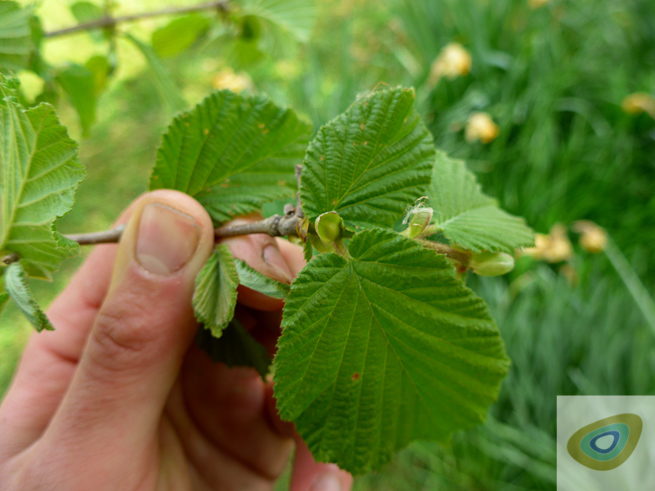
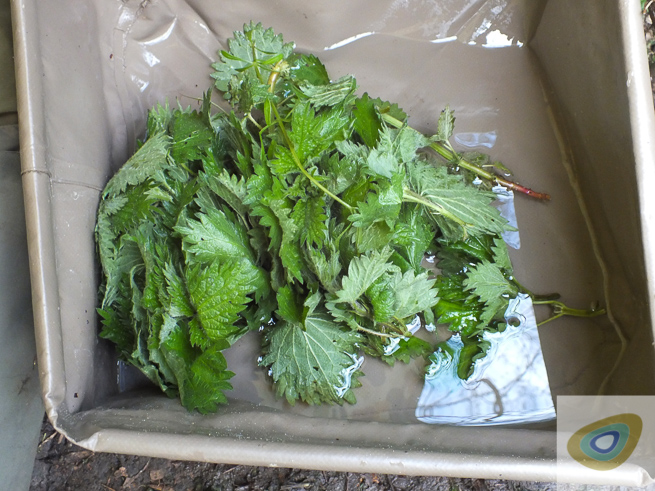
While we hunted for morels in the woods, our eyes were dialled into finding other edibles for our spring time feas. As we walked through the woods we came across some new shoots of stinging nettles, Urtica dioica. These we gathered up to make a green side dish to accompany the venison. I have two favourite ways to cook stinging nettles. The first is just to keep the stems long and wilt them over a hot ember fire, this burns off the stingers and crisps up the leaves nicely leaving you with what we like to call “nettle crisps”. The second is to just take the freshest tips; wash, finely chop them and blanch them for 2 minutes in boiling water. Given that it was so early in the year the nettles were very short, so option 2 it was.
The second great find we had during our wandering after the morels was a large area of burdock, Arctium lappa. Burdock, much like carrots or potatoes, use their leaves to collect energy through sunlight, convert it, then store it in an underground storage organ. These plants are a great source of carbohydrate, but it can take some energy to dig up the roots. It’s also important to harvest the roots at the correct time in the plant’s life-cycle. So make sure you chose the right ones to dig up! You can read more here: Five Survival Plants Every Forager Should Know.
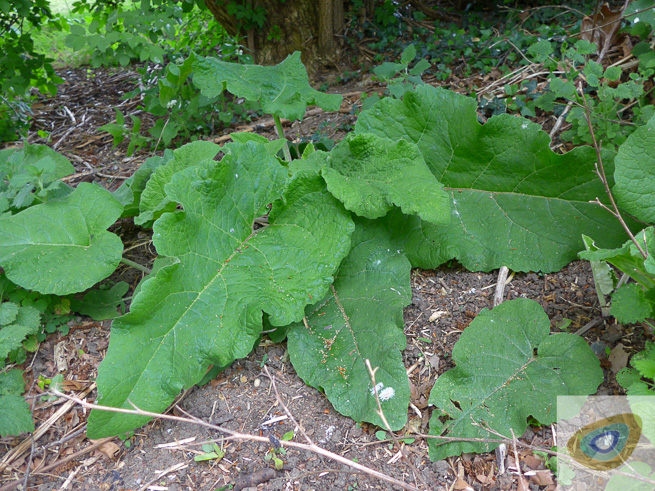
Burdock is biennia; this means that the plant has two years to complete its biological lifecycle. In the first year the plant stores all of its energy in its tap root, in the second year it uses this energy up to grown a flowering stem. This means that the best time of year for us to collect the storage organ is at the end of the first year or the beginning of the second. We dug up three burdock plants using a digging stick and were careful not to disturb the other plants nearby.
Cooking Up A Springtime Feast
Now we had done some foraging, the next thing that we needed to do was start to cook. First job on the list was to start a fire. Our choice of cooking method for the venison and the burdock was to build a pit oven. This method of cooking is quite simple, and requires a few materials commonly found in the woods.
In this particular spring, the woods we were in were extremely damp. As soon as we dug two or three feet down the ground became very wet. So in order to create a space deep enough to make the pit oven method work we put a ring of large stones around the edge of the pit and banked this up with earth.

Pit oven prepared with a ring of stones around it. Photo Paul Nicholls.
The next important material we needed for a pit oven was big stones to heat in fire until they were extremely hot. This can be dangerous because the stones, when heated, can explode sending hot shards of rock in all directions. The way to mitigate this risk is by not collecting rocks that have been soaked in water, such as in a stream or river. Also it should be noted you should never, under any circumstances, use flint.
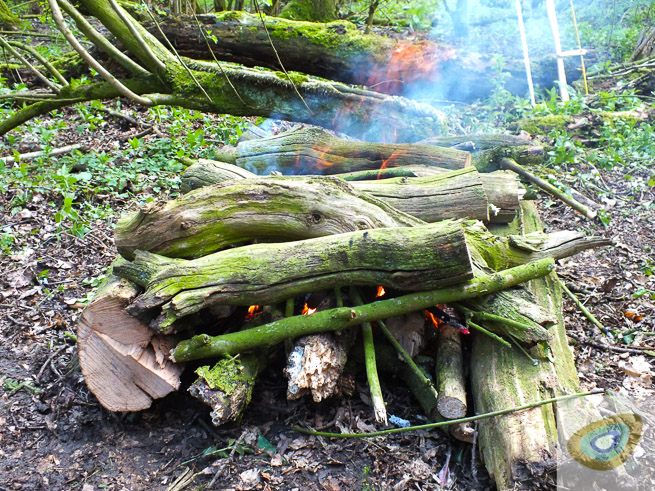
Once the stones have been collected we also needed lots of dry fire wood, preferably hard wood that would burn really hot and create a good ember bed. Oak, beech, willow, ash and some maples were on our list to search for.
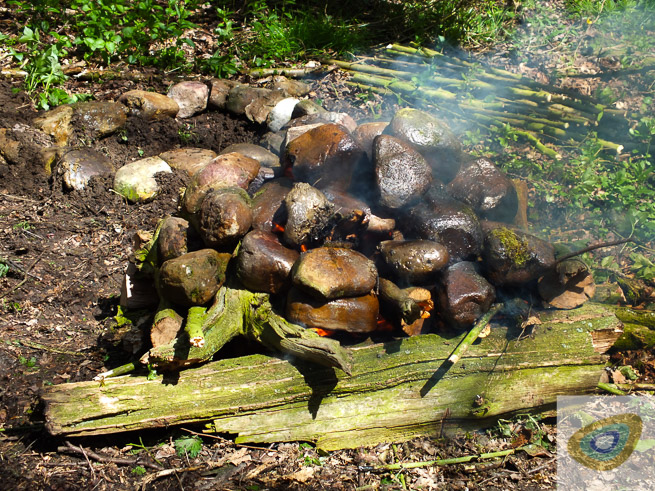
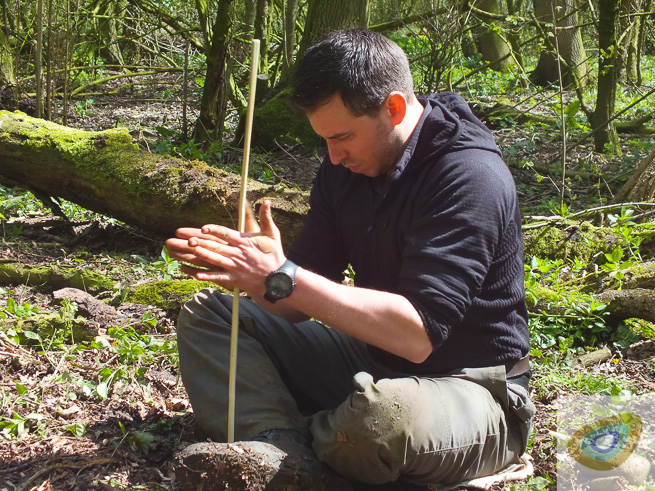
We gathered several limbs of dry well seasoned oak we found caught up in the branches off the ground; this is always a satisfying find when on the hunt for fire wood. To ignite the fire, I used the opportunity to practise my hand-drill technique. Once the fire was lit and burning strongly, we banked all of our large stones on top to heat them. Just to be safe we both walked away from the fire for the first half an hour or so just in case any of the stones did decide to explode.
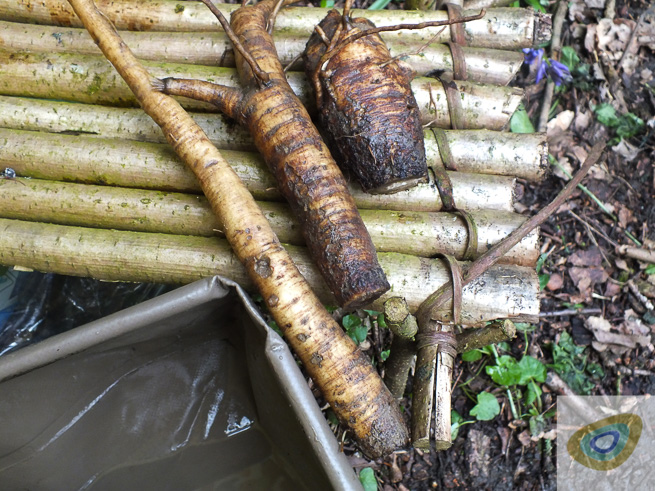
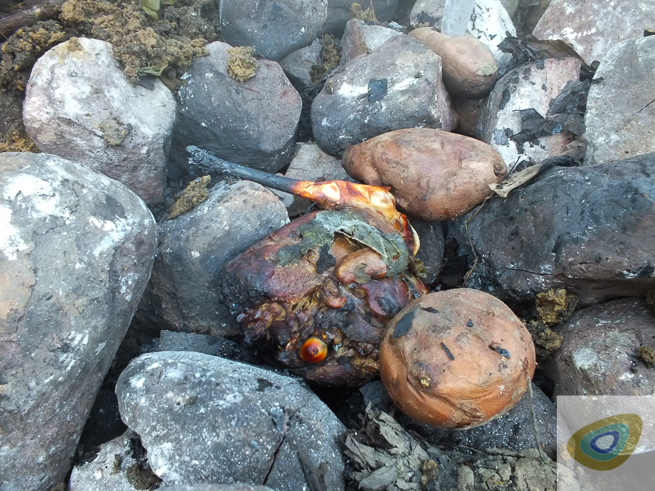
The fire burned with high hot flames for about an hour; during this time Spoons and I went to collect some live hazel branches to aid in removing the soil after cooking. Once the rocks were hot we used a spade to dig them out of the fire and packed them in to the pit in two layers, one underneath the meat and vegetables and one on top. Notice the difference in colour in the photo between the hot rocks in the middle of the pit and the rocks around the edge.

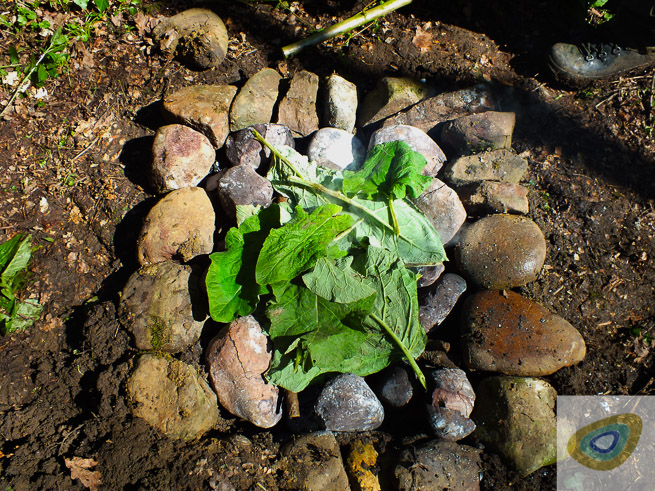
Now that the meat and vegetables were in the pit and surrounded by hot rocks, the next thing we needed to do was to seal the heat in the pit using soil. Having soil and grit all over your food is not the best way to season it, so we used straight hazel branches laid side by side with burdock leaves on top to protect the food. Now we could pile soil on to the pit knowing that when we wanted to remove the food we could dig out the ends of the hazel branches and lift them out with most of the soil on top.
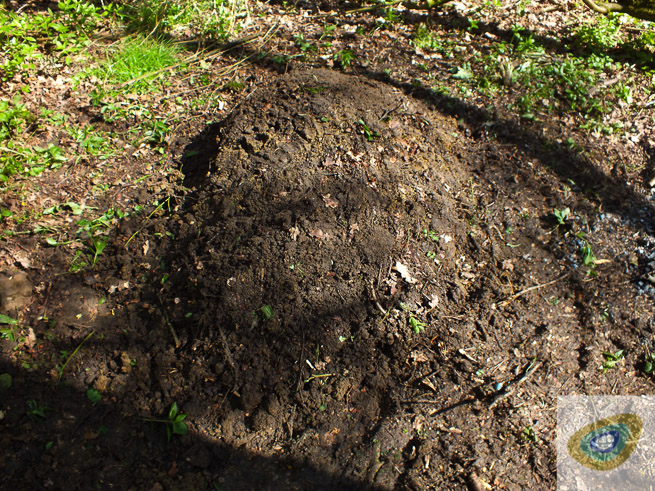
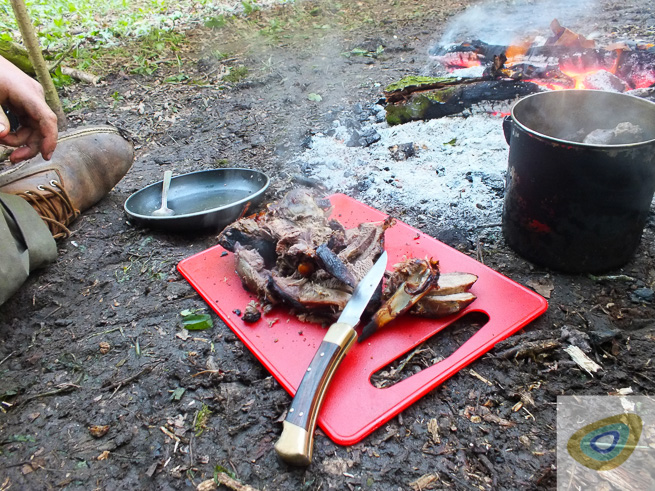
The pit was sealed with soil and we left it for about 70 minutes to cook the meat and vegetables. Then we very carefully dug up the soil and used the hazel branches to lift the majority of the soil off the top of the pit. The stones were still very hot and we took care to use the shovel and a pair of gauntlets to remove them and uncover the food, this can be done with two green sticks if you don’t have a shovel.
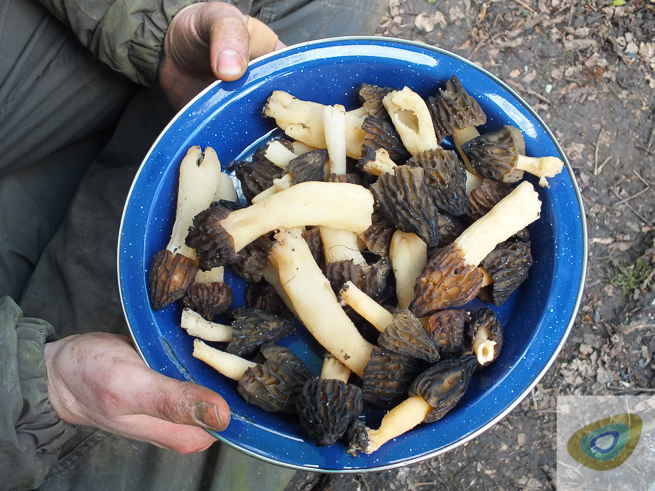
The meat and vegetables were delicious, our side dishes of morels and nettles made the meal like a Sunday roast. A truly great day was had by both of us and we thoroughly enjoyed the experience.
Spring is a great time to go foraging and to cook outside. We hadn’t planned on foraging for morels but it just goes to show why you should keep your eyes (and mind) open to opportunities…
In the comments below, let us and other readers know what your spring foraging or cooking favourites are….
Latest posts by Henry Landon (see all)
- A Springtime Feast: Cooking Up A Treat In The Woods - April 22, 2020
- Getting Fit For Your Next Adventure - April 10, 2020
- The Value of Carrying a Rope While Hiking - June 6, 2017
Rob
Thanks for sharing your experience, Paul. It’s great to see what can be done with a little luck and care.
I haven’t seen any morels yet but I’ll keep my eyes open from now on – though with due care. The idea of building up a hungi / pit oven rather than digging down is a useful tip.
Thanks again for continuing to share ideas during the current unpleasantness. Hope to join you on another course once the new normal has been established.
Henry
Hi Rob,
Thanks for reading and for your comment, yes we were very lucky to find the Morels when we did, and now is a good time of year to look for them. Hopefully we will all be getting out and about more in the near future, so keep and eye out for seasonal treats and hopefully see you on another course soon.
Cheers,
Henry
Olivia
Thanks for sharing your experience, Paul. It’s great to see what can be done with a little luck and care
bushcraft knife under 50