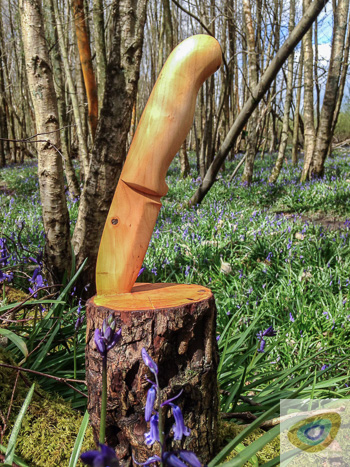
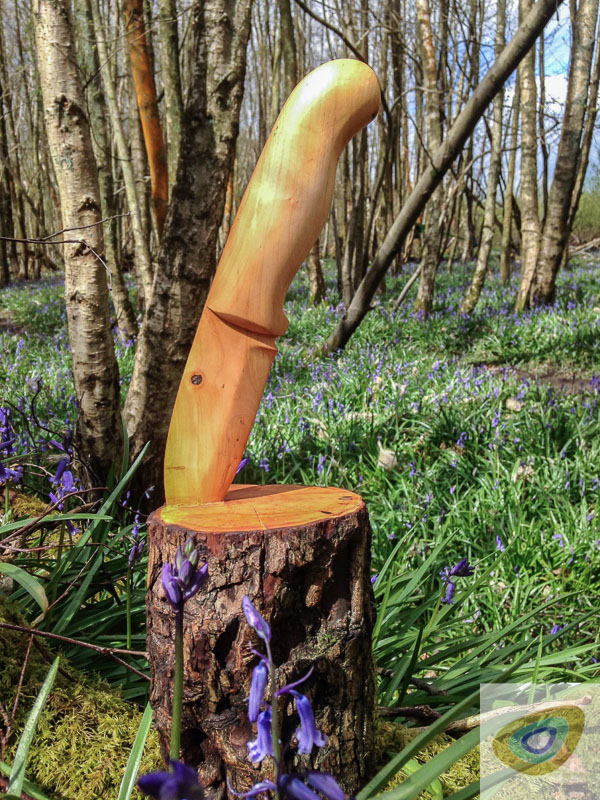
A few years ago I wanted to carve a knife out of wood, as if it had just been stuck in the top of a log.
I came up with this idea after having seen some pictures of knives displayed this way. I gave it a lot of thought and then came up with a plan and set about my new project.
The first one I carved was given to Ben and Lois Orford but unfortunately this one was stolen from their display stand at a show. So, I carved Ben and Lois not only a replacement knife, but also a carving of an axe, both of which are replicas of Ben’s work.
I was so pleased with those carvings that this led to me carving a replica of Paul Kirtley’s PK1 knife, made by Raven Armoury. The carving is a life size replica, approx. 8 and a half inches long and 1 inch wide at the handle
I found a lovely piece of dead standing Hawthorn. I chose dead standing as opposed to green as it is less likely to split when drying out.
I made side and front view paper templates of the knife which were to scale and used these throughout the carving process.
I now present a step by step photo record of how I approached this project.
Getting Started – Material Selection And Preparation
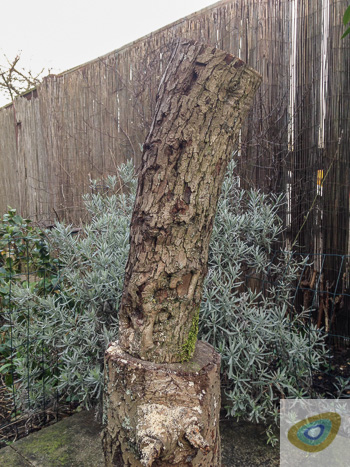
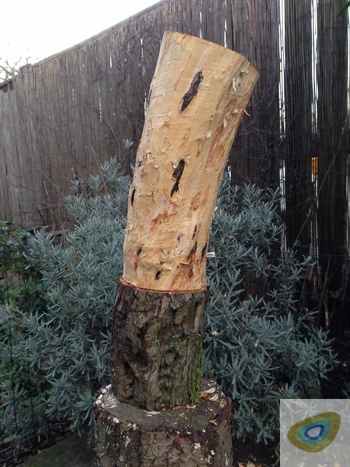
The piece of wood selected was about 18 inches long and four inches wide fairly knot free with a slight curve in it. Then I made a level saw cut, to the depth of the bark, all the way around the log. This cut around the circumference marked the point at which the knife would be stuck into the log. I then stripped the outer bark from the half to be carved into the knife.
Using Templates To Draft The Shape Of The Carving
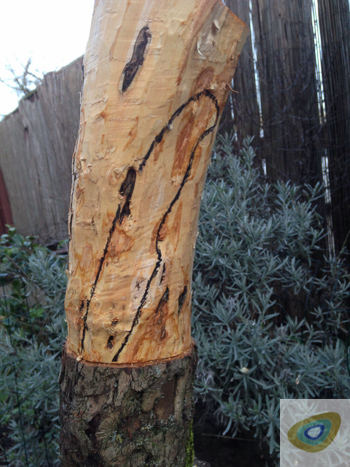
I then used templates to draw the two dimensional profile shapes of the knife onto the wood. These were based on photographs of Paul’s knife.
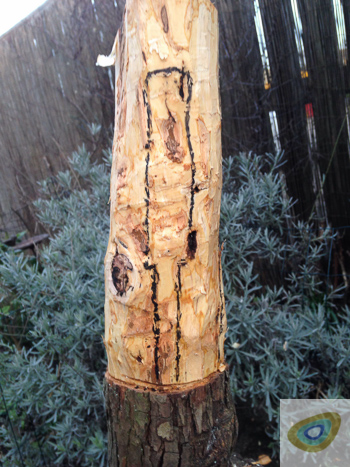
Starting To Carve – Removing Excess Wood
First, I made stop cut on the same saw line where I cut originally to de-bark. This cut is where the point of the knife will appear to be stuck in the log base. Then, I began with carving away the sides. Removing some wood meant I lost my sketch, so after a while I re-drew the front profile. Similarly later on with the side profile. It’s important not to lose sight of what you are trying to achieve.

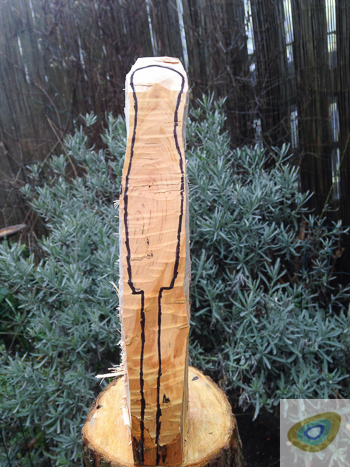
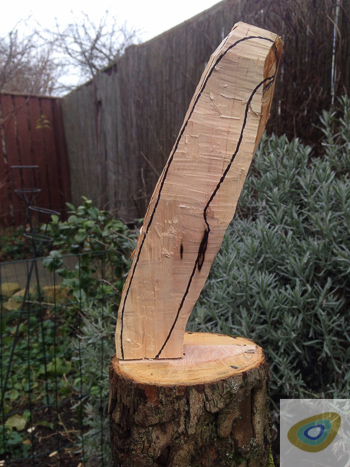
Now To Make Some Saw Cuts…
I put the axe down for a moment to make some saw cuts. These are made down towards the template lines drawn on the wood and help remove further material quickly and efficiently. Accuracy is key here, do not cut past the blade lines.
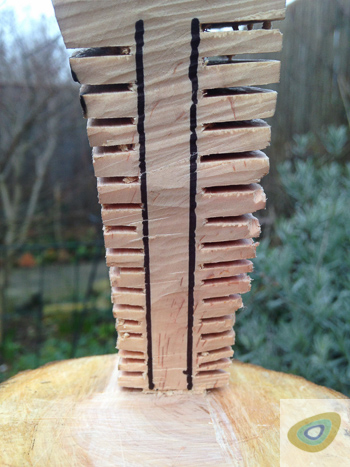
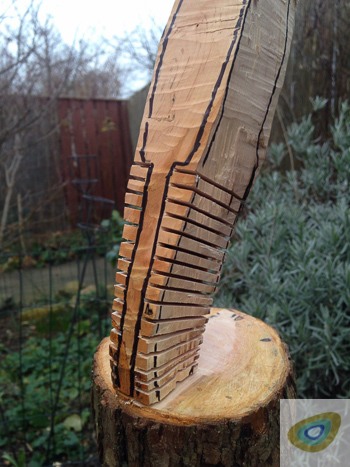
Getting The Shape; Remove All Excess Wood From Between The Saw Cuts.
Gently and carefully break out the pieces of excess wood so you end up with the rough outline shape of the knife. I used my Ben Orford 4″ Woodlander knife for this as it is ideal for close, fiddly bits like this.
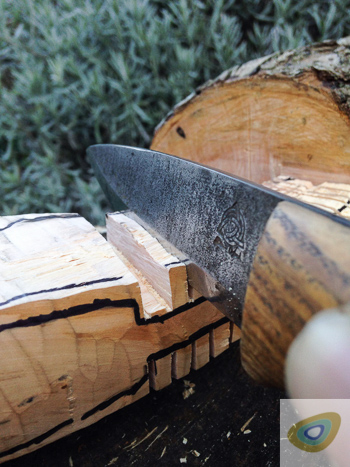

Tidying It Up
This is close work so I took my time over this part, carefully shaping the wood right up to the template lines. I continually checked from all angles to ensure lines were straight and balanced. I used my Ben Orford English Sloyd carving knife for this.

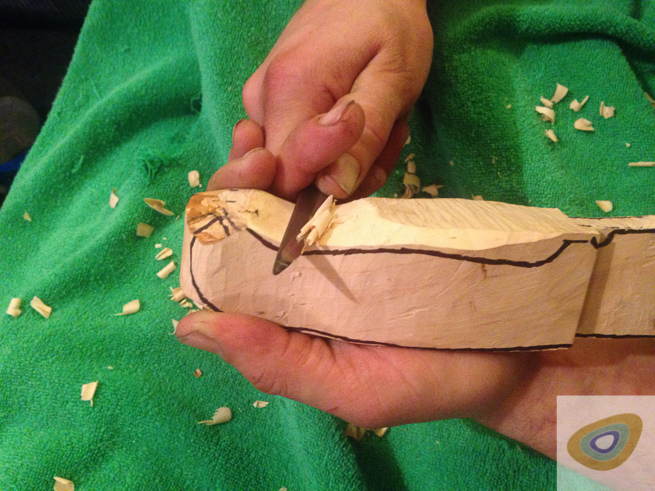

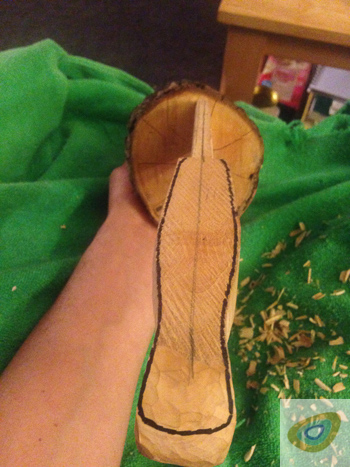
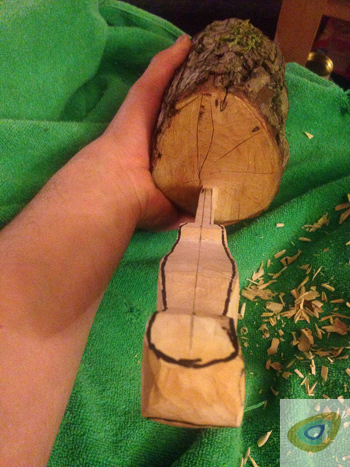
Shaping The Knife; Rounding Off The Edges
Now you need to cut the corners off to get the curves. Make sure you cut equal amounts on both sides. I have drawn lines on the knife to help me, but again, I continually check all angles during this process. Take your time at this stage and do a little at a time so as to prevent taking too much off. You should be able to feel when you have the curve right. Don’t worry about the pencil marks as they will come off once you start sanding.
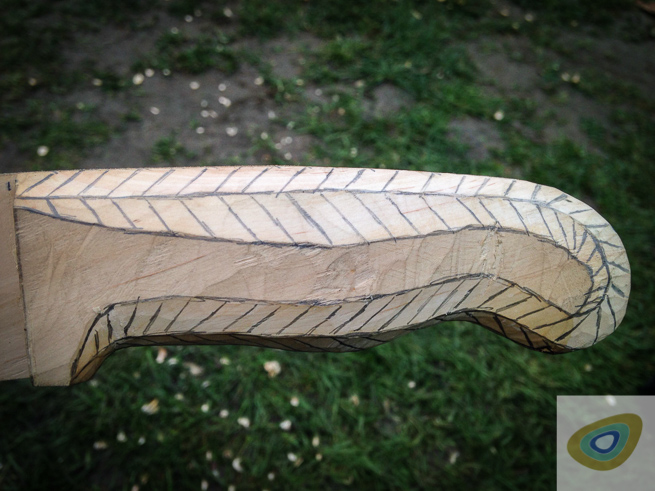

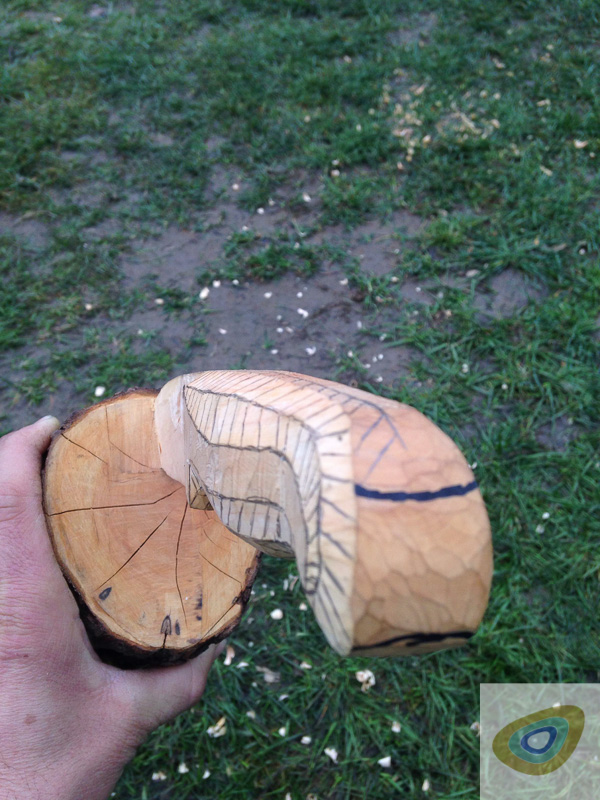
The Final Touches; Adding Fine Detail, Sanding and Oiling
At this stage, I refer back to the original knife, or images, to add any fine details that make it a true representation. For sanding, I use Abranet as I find it does a better job than regular sandpaper, particularly on fine carvings. To finish, I just applied a light coating of Walnut Oil which gives a lovely sheen.


Why Not Have A Go?
It would be fantastic if this photoblog inspires you to carve something similar. Feel free to ask any questions about this or any other featured project. Good luck if you have a go and don’t forget to send pictures!
Paul Nicholls
Latest posts by Paul Nicholls (see all)
- Making Gypsy Flowers – An Exercise In Knife Skills - March 28, 2017
- Cooking Beef In A Pit Oven - March 7, 2017
- How I Carved A Knife In A Log - December 20, 2016

Mick
Fabulous, been looking forward to this blog and not disappointed. Brilliant piece of work and great post to show how it was done. Thanks spoons.
Liam Gadd
Very nice work!
Ronny Machado
Man…that’s a beautiful work of art, and yes…very, very inspiring…
Thanks for sharing the whole process
R.
Astrid
Love this Paul!
Stephen Walker
Hi Paul,
Excellent carving from a genius idea.
More inspiration!!
Thanks,
Stephen
Marcel (Buck) Lafond
Paul, that was beautiful work. I am inspired. I may just try that, but which knife will I carve? Hmm?
We’ll see…